MIGHTY MORPHIN POWER RANGERS/TEENAGE MUTANT NINJA TURTLES II #4 (BOOM! STUDIOS/IDW)

Welcome to an all new edition of Parlay Points, the comic book review blog to the ODPH podcast!

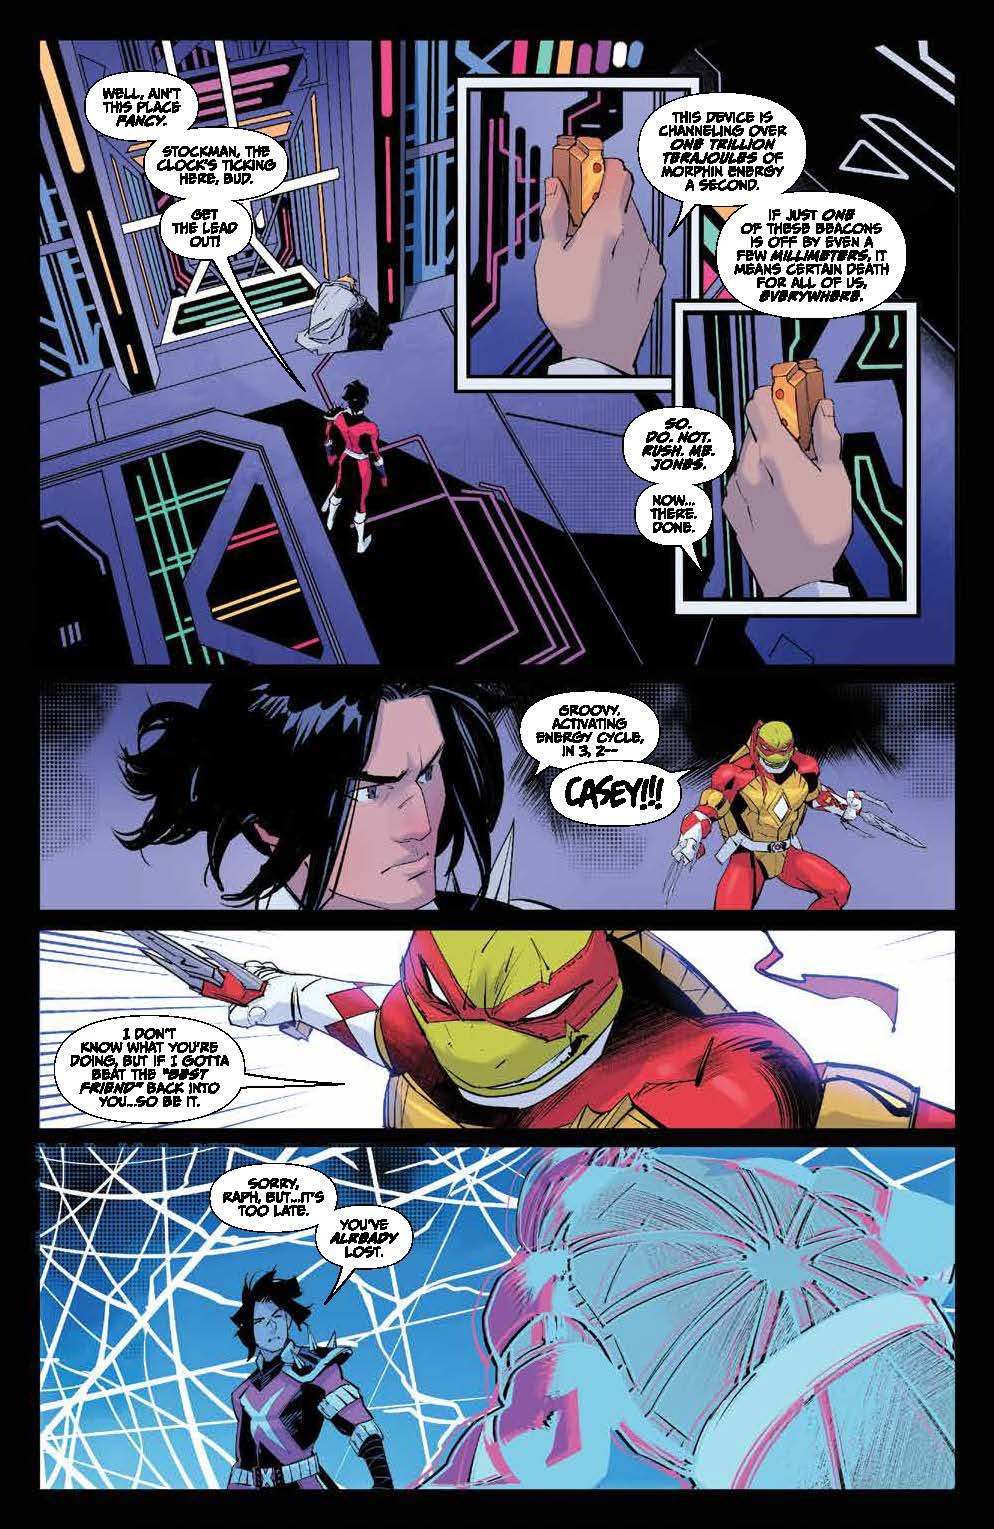
For this entry, we have arrived at the pen-ultimate point in the sequel to the 2019 story involving two of the biggest fandoms in all of pop culture. Representing BOOM! Studios are the legendary MIGHTY MORPHIN POWER RANGERS! Returning to join them for this adventure and hailing from the pages of IDW Publishing are the “Heroes in a Half Shell”, the TEENAGE MUTANT NINJA TURTLES. MMPR/TMNT II #4 by Ryan Parrott, Dan Mora, Raul Angulo and Ed Dukeshire has been an exciting ride with great twists and amazing creative takes mixed throughout. Going into the final moments, all bets are off on how this shapes up for the finale.

Let’s not waste any more time and check out what’s happening here, shall we?

MIGHTY MORPHIN POWER RANGERS/TEENAGE MUTANT NINJA TURTLES II #4

Creative: Ryan Parrott, Dan Mora, Raul Angulo and Ed Dukeshire 

Credit: Boom Studios & IDW Publishing

MIGHTY MORPHIN POWER RANGERS/TEENAGE MUTANT NINJA TURTLES II #4

Creative: Ryan Parrott, Dan Mora, Raul Angulo and Ed Dukeshire 

Credit: Boom Studios & IDW Publishing

*** POSSIBLE SPOILER WARNING ***

When these two forces meet the first time, their combined efforts defeated Shredder and Rita Repulsa. In the aftermath, Shredder was dropped off the radar. Casey Jones (longtime TMNT ally) hasn’t given up on finding his whereabouts although his plans have gone in a very different direction. Meanwhile, the Turtles are enjoying time away in Angel Grove (home of the Power Rangers) . There is no rest for the weary as the good guys are brought back into action when a jailbreak commences involving freeing Baxter Stockman (TMNT villain) by a rogues gallery led by Ranger X….who is revealed to be Casey Jones himself!

The heroes try to figure out the reasoning for their friend to jump sidelines but face an even bigger threat right at their doorstep….literally. Rita Repulsa has led an army to the Power Rangers Command Center! As the takeover commences, a new player enters the field: Shredder who is surprisingly helping the heroes (for his own personal reasons). They need all the help they can get when the Morphin Grid is compromised and drastic measures are taken to fight back. These actions lead to our heroes to make a dangerous call. The Turtles make a deal to work with Shredder to take the fight to Krang’s headquarters in Dimension X!

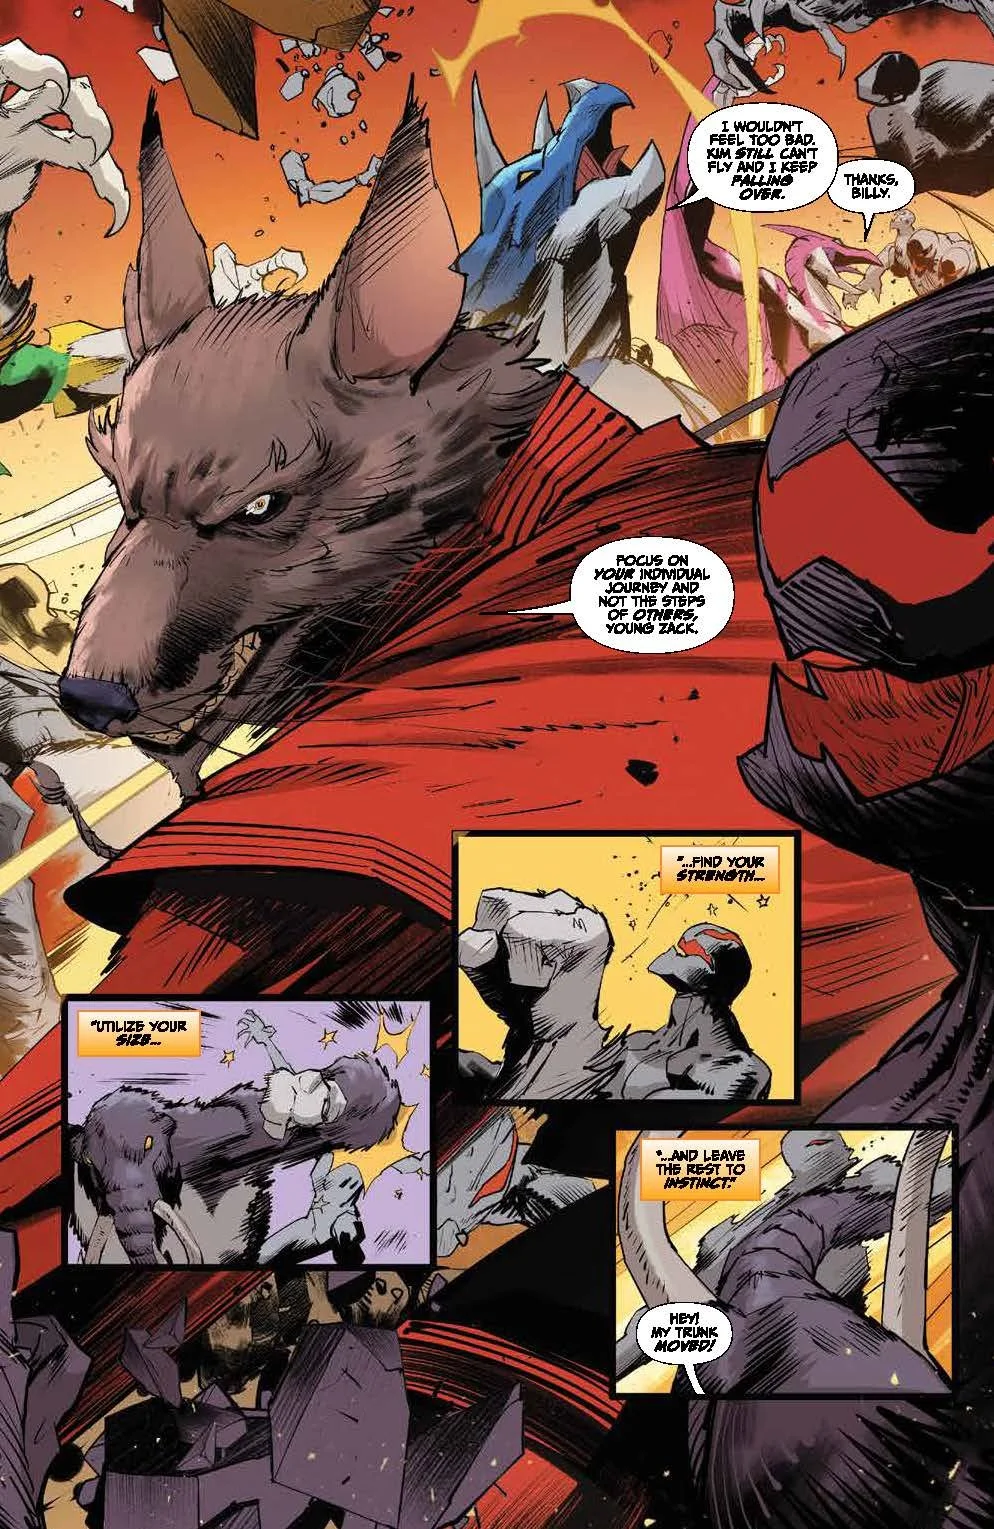
This issue kicks off with the reluctant partners making their way through the desolate Dimension X terrain to Krang’s headquarters. Readers bare witness to some great conversation between the Turtles and their greatest enemy. Hearing Shredder talk about his true driving motives was a moment not to be forgotten. Meanwhile back in Angel Grove, the Rangers (each using a hybrid mutagen - morphin coin) are taking the fight to Krang’s forces. Readers will be blown away by the action unfolding. Master Splinter is leading the team through the tough challenge ahead but there is more pressing issues waiting if they survive.

Krang and Rita Repulsa make their final plans inside what remains of the Command Center. Before getting to see that through, Rita does have one loose end to deal with and its’ one that will play some big implications in the finale. With victory in their grasp, what does this evil pair have in line for the finish? Will the Turtles push into Dimension X be all for nothing? Even with the fantastic moments involved in their mission hat nee to be seen to be believed, victory is far from guaranteed. The story ramps up to a fever pitch with readers left with their jaws dropped at the final page of this issue! No one is ready for that moment! No One!

MIGHTY MORPHIN POWER RANGERS/TEENAGE MUTANT NINJA TURTLES II #4

Creative: Ryan Parrott, Dan Mora, Raul Angulo and Ed Dukeshire 

Credit: Boom Studios & IDW Publishing

MIGHTY MORPHIN POWER RANGERS/TEENAGE MUTANT NINJA TURTLES II #4

Creative: Ryan Parrott, Dan Mora, Raul Angulo and Ed Dukeshire 

Credit: Boom Studios & IDW Publishing

MIGHTY MORPHIN POWER RANGERS/TEENAGE MUTANT NINJA TURTLES II #4

Creative: Ryan Parrott, Dan Mora, Raul Angulo and Ed Dukeshire 

Credit: Boom Studios & IDW Publishing

BREAKDOWN: Parrott sets the players in place superbly heading into the finale issue. The banter between the Turtles and Shredder is a solid pace breaking moment which gives some great insight behind the Turtles greatest foe. He turns out to be the driving character of this issue with his actions in Dimension X. Being a reluctant hero in some sense makes readers connect with Shredder on a different level. Master Splinter leading the Mutated Rangers was another highlight that readers will enjoy reading. Seeing switch-ups like this has given the fandoms great memories to take with them after this series wraps up. Parrott once again puts on a clinic for juggling all these characters with excellent pacing. All the key players get their due and standout moments building for an explosive ending to this incredible sequel.

DAN. MORA. NUFF. SAID! Seriously, the energy pouring out of the action panels is unmatched. The two page spread with Splinter and the Mutated Rangers is absolutely mind-blowing. Every page keeps up a manic pace to never let the readers catch a moment. Mora’s version of Krang is unparallel. The details put into his suit make an impact . It compliments’ Rita’s deranged delight in what their plans are succeeding with. This shines thru when Rita is taking care of her loose end issue. A previously mentioned with Parrott, Mora gets in so many characters with his action panels that they feel bigger than the moment unfolding. The issue’s surprise moments continue to jump off the page but noting compares to the mic drop full page panel to conclude this issue’s events on.

MIGHTY MORPHIN POWER RANGERS/TEENAGE MUTANT NINJA TURTLES II #4

Creative: Ryan Parrott, Dan Mora, Raul Angulo and Ed Dukeshire 

Credit: Boom Studios & IDW Publishing

MIGHTY MORPHIN POWER RANGERS/TEENAGE MUTANT NINJA TURTLES II #4

Creative: Ryan Parrott, Dan Mora, Raul Angulo and Ed Dukeshire 

Credit: Boom Studios & IDW Publishing

MIGHTY MORPHIN POWER RANGERS/TEENAGE MUTANT NINJA TURTLES II #4

Creative: Ryan Parrott, Dan Mora, Raul Angulo and Ed Dukeshire 

Credit: Boom Studios & IDW Publishing

MIGHTY MORPHIN POWER RANGERS/TEENAGE MUTANT NINJA TURTLES II #4

Creative: Ryan Parrott, Dan Mora, Raul Angulo and Ed Dukeshire 

Credit: Boom Studios & IDW Publishing

FINAL POINT: The combined forces of two of pop culture’s biggest superhero teams are pushed to the brink with the fate of the world slipping thru their grasps. Parrott, Mora and the team craft a highly engaging issue with their phenomenal writing and energetic artwork. Every page feels like a massive event that only builds up the tension heading into a must-read finale. The series has been a priority pick-up each previous issue and that streak continues with the latest chapter!

Hit me up on ODPH social media and let me know what you thought of Mighty Morphin Power Rangers/Teenage Mutant Ninja Turtles II 4. Thank for reading!

DAMN THEM ALL #6 (BOOM! STUDIOS)

Welcome to an all new edition of Parlay Points, the comic book review blog to the ODPH podcast!

For this entry, we’re checking out the final issue of the first arc of BOOM! Studios breakout supernatural series. Right before this issue’s release, it was announced by BOOM! that this series has been officially certified into ongoing status! This is a huge win for fans of the adventures of Ellie Hawthorne, who has bursted onto the shelves at the local comic shop with one hell of a story to tell. DAMN THEM ALL #6 by Simon Spurrier, Charlie Adlard, Sofie Dodgson, Shayne Hannah Cui, and Jim Campbell looks to finally answer one of the biggest mysteries of the series thus far! Let’s not wait any longer and take a closer look at everything bringing a close to this initial debut tale.

Editor warning: this book has some panels that might be too mature for younger readers. That said, if you’re still good to go, let’s begin!

DAMN THEM ALL #6

Creative: Simon Spurrier, Charlie Adlard, Sofie Dodgson, Shayne Hannah Cui, and Jim Campbell

Credit: BOOM! Studios

DAMN THEM ALL #6

Creative: Simon Spurrier, Charlie Adlard, Sofie Dodgson, Shayne Hannah Cui, and Jim Campbell

Credit: BOOM! Studios

*** POSSIBLE SPOILER WARNING ***

In case you’re just learning about this series now, Ellie Hawthorne has been tasked with the mission her late uncle Alfie had: stop the 72 devils of the Ars Goetia and send them back to Hell by any means possible.

During this mission, Ellie has had a group of allies to help her quest, let by Dora, a former officer with a connection to Alfie. Having some back-up to fight some devilish foes never hurts, especially when they are like Theo Bolster and the 500 Club. Ellie defeated Theo in their initial face-to-face encounter via an impromptu exorcism. From there, Ellie and Co. have hit the ground running dealing with threats like Ninebob Barry and Theo’s personal devil: Glasya-Labolas in a fashion that’s all Ellie’s.

The biggest moment to date was at the end of last issue, where Ellie and Dora make contact with the spirit of Alfie Hawthorne and how he died. It has been one of the biggest mysteries of the season and gets answered in a manner that no one sees coming. Alfie wasn’t murdered as guessed. It appears at first glance, it was by suicide.

This issue picks up right in the middle of Alfie talking with Ellie and Dora. Alfie narrates how he was told he had only a year left and lived two. Alfie sought whatever and whoever he could to help his situation out. This meant mending fences with Theo and seeing what he could do to help. There wasn’t much as Alfie decided to end his life. Ellie sees some holes in Alfie’s story and begins to question it. Readers sit back and see Ellie rip into Alfie’s claims.

The resolution to this is one for the ages as Ellie demonstrates how much she has grown in the time of taking Alfie’s spot. It also shows that she has much left to do before her story ends. When another familiar face returns to hit Ellie on a personal level, readers will need to prepare for the worst. This causes a series of events to domino until there are a few characters in the final act walking out unscathed.

The first arc wraps up with a few surprises to end things on a high note. The Ars Goetia will still be a threat going into the next arc, but moves are being done on both sides cementing that this series has a lot more to finish. Excellent final act to tie everything together and set the stage for the next arc to come.

DAMN THEM ALL #6

Creative: Simon Spurrier, Charlie Adlard, Sofie Dodgson, Shayne Hannah Cui, and Jim Campbell

Credit: BOOM! Studios

DAMN THEM ALL #6

Creative: Simon Spurrier, Charlie Adlard, Sofie Dodgson, Shayne Hannah Cui, and Jim Campbell

Credit: BOOM! Studios

DAMN THEM ALL #6

Creative: Simon Spurrier, Charlie Adlard, Sofie Dodgson, Shayne Hannah Cui, and Jim Campbell

Credit: BOOM! Studios

BREAKDOWN: Spurrier delivers on a solid reveal of the mystery of Alfie Hawthorne. It is one that most readers never saw coming but follows the blueprint set up with issue #1. Ellie Hawthorne comes across as every bit as stubborn and jaded as her uncle was. Their dynamic pays off huge as Alfie’s death has been a huge puzzle that had many levels to it. The fallout from the reveal carries into another emotional sequence involving a returning character that Ellie has had an awkward dealing with. The payoff from all of these moments hits readers with a simple panel showing the toll this has all taken on Ellie. Spurrier captures this moment perfectly and gives readers a small glimpse at the true Ellie. The pacing allows each major character to get their time in before saying good-bye for now. All that remains is building anticipation to the next chapter with a final panel that raises a few thoughts.

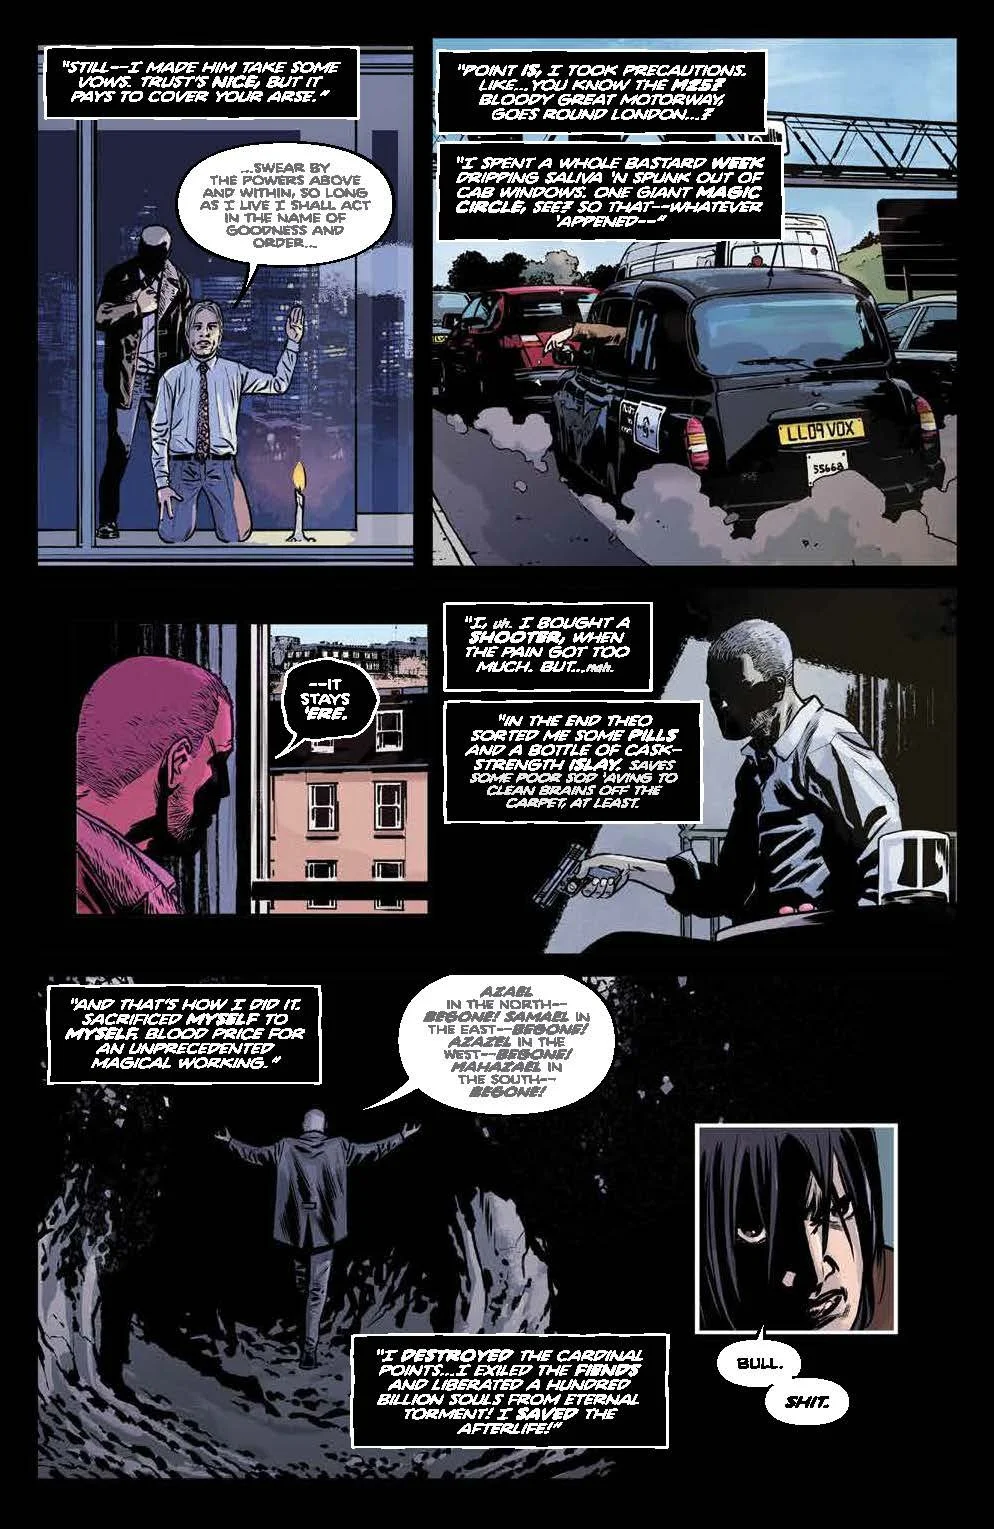
Adlard doesn’t miss in the delivery of the Ellie/Alfie confrontation. Very solid technique in keeping Alfie’s face in the shadows where readers never see his eyes. Ellie’s reactions featured her range of feelings that have been building since his passing. The imagery used in these moments convey a direct implication at how the usually unemotional lead character lets her guard down. This gets highlighted even more when Ellie’s next conflict transpires with a major surprise twist. The images never hold back from being brutal and bold. Adlard builds upon the writing capping everything with a final panel that is sure to have fans talking.

DAMN THEM ALL #6

Creative: Simon Spurrier, Charlie Adlard, Sofie Dodgson, Shayne Hannah Cui, and Jim Campbell

Credit: BOOM! Studios

DAMN THEM ALL #6

Creative: Simon Spurrier, Charlie Adlard, Sofie Dodgson, Shayne Hannah Cui, and Jim Campbell

Credit: BOOM! Studios

DAMN THEM ALL #6

Creative: Simon Spurrier, Charlie Adlard, Sofie Dodgson, Shayne Hannah Cui, and Jim Campbell

Credit: BOOM! Studios

FINAL POINT: The saga of Ellie Hawthorne has only just begun but has given readers enough memorable moments, one would think it’s been around for years instead of only six issues. This is all due to the fantastic work of Spurrier, Adlard and the team creating a supernatural experience unlike anything else at the local comic shops out now. Damn Them All might be done for now, but like any great story, it’s not getting banished away fro long. Till then, don’t miss picking up this and any previous issue on New Comic Book Day and see what all they hype is about!

Hit me up on ODPH social media and let me know what you thought of Damn Them All #6. Thanks for reading!

MIGHTY MORPHIN POWER RANGERS #106 (BOOM! STUDIOS)

Welcome to an all new edition of Parlay Points, the comic book review blog to the ODPH podcast!

For this entry, we are taking a look at the next installment from a creative team that is carving out a huge legacy in the Power Rangers mythos in a very short amount of time. In just five issues , Melissa Flores and Simona Di Gianfelice have re-invented a classic villain whose actions have broken the biggest evil in MMPR history while keeping the both the Omega and Power Rangers on the defensive to stopping her master plan. Mighty Morphin Power Rangers #106 by Flores, Di Gianfelice, along with Raul Angulo, and Ed Dukeshire for BOOM! STUDIOS looks to continue the winning ways. Let’s take a closer look and see what’s happening in the latest chapter, shall we?

Mighty Morphin Power Rangers #106

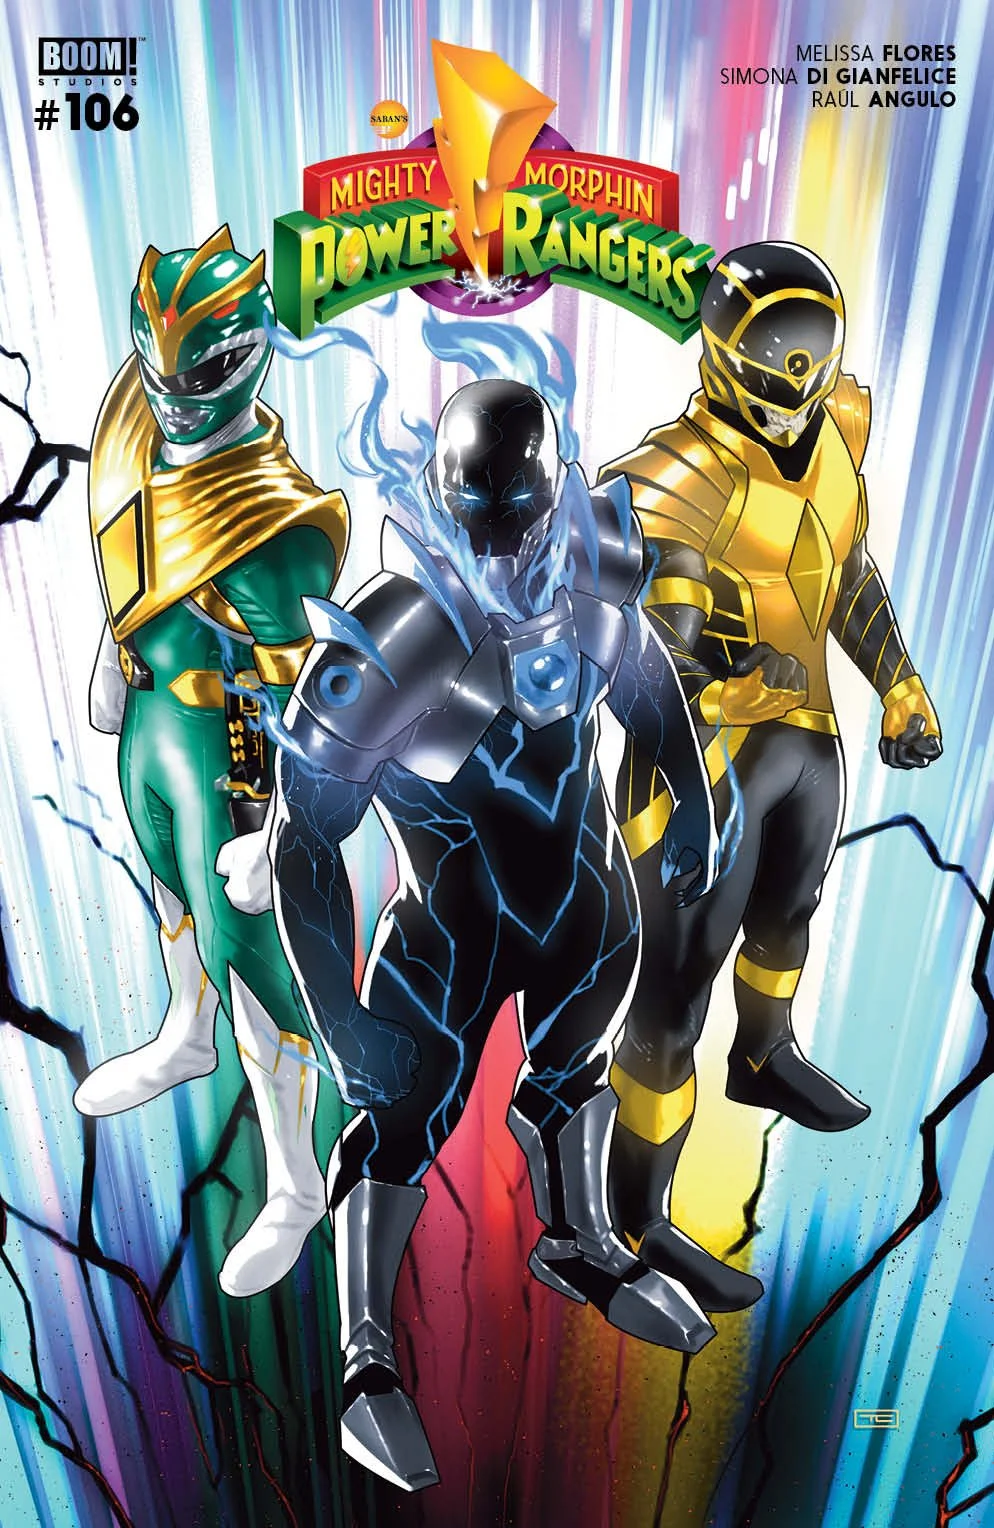
Creative: Melissa Flores, Simona Di Gianfelice, Raul Angulo, and Ed Dukeshire (Cover: Taurin Clarke)

Credit: BOOM! Studios

Mighty Morphin Power Rangers #106

Creative: Melissa Flores, Simona Di Gianfelice, Raul Angulo, and Ed Dukeshire (Cover: Taurin Clarke)

Credit: BOOM! Studios

*** POSSIBLE SPOILER WARNING ***

In their wildest dreams, the heroes of Angel Grove could never imagine that one of their most legendary foes could become even more of a threat. Yet, that is exactly what has happened with Rita Repulsa who has now become Mistress Vile. Vile made an immediate impact when she dismantled Lord Zedd and left him lying at her feet in front of the young heroes to witness. Since then, Matt aka The Green Ranger has become Vile’s prisoner. Alpha-1 has pledged allegiance to Vile’s vision and challenged the Rangers. Factor in that Zedd is now recovering from his defeat and plotting revenge, the Rangers are surrounded by Vile’s efforts with no way out.

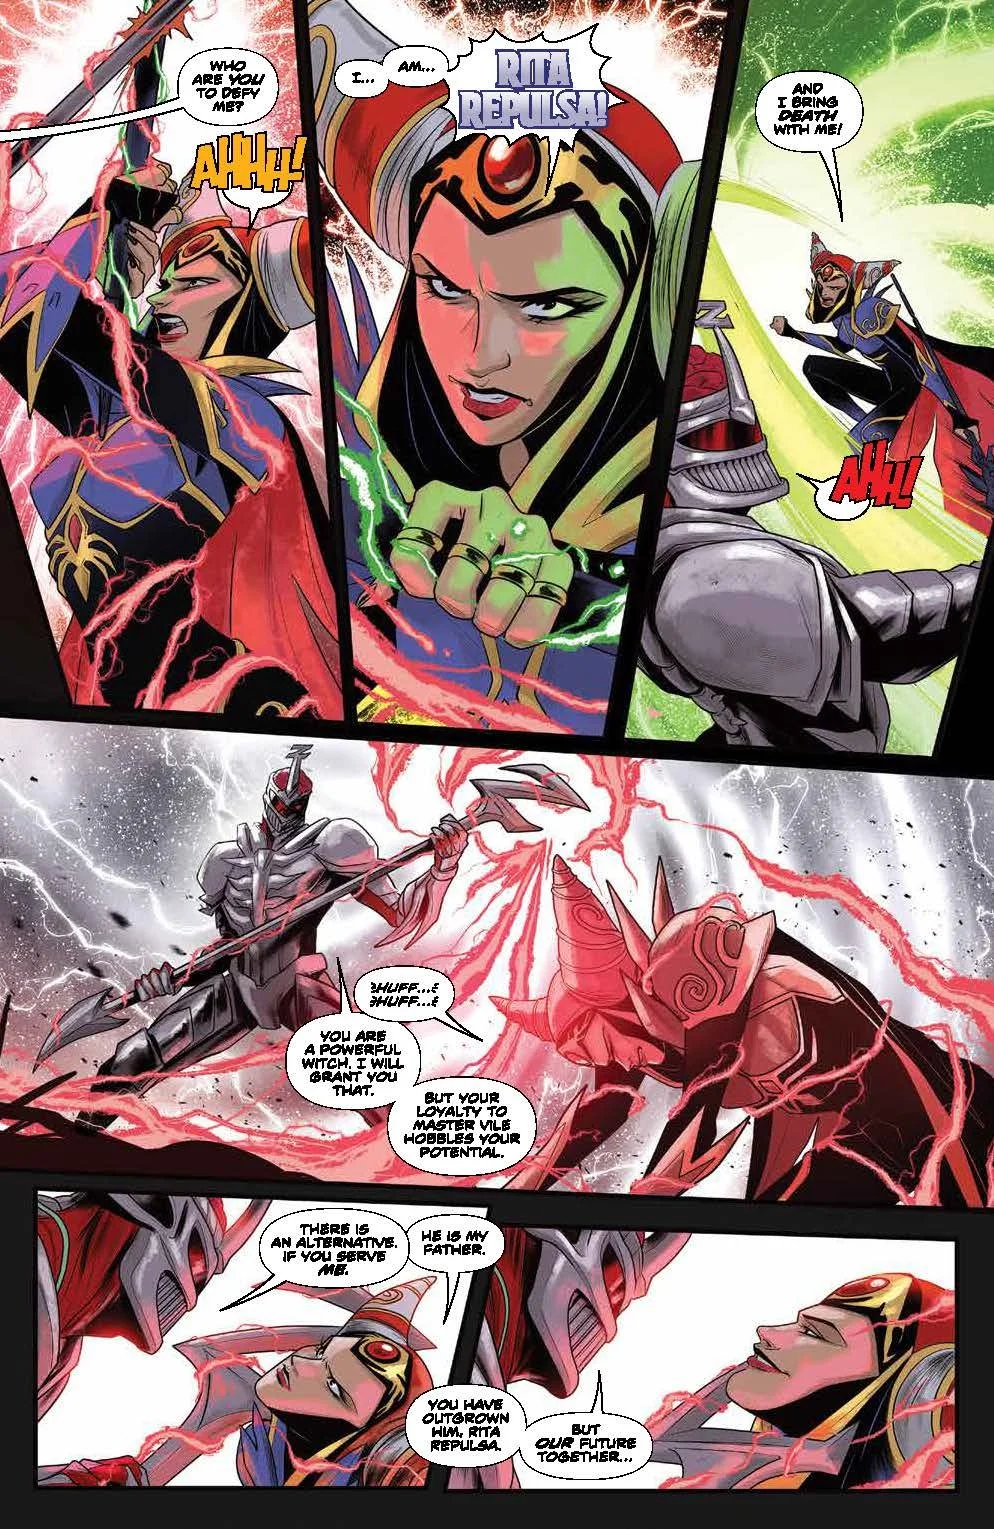
This issue opens up with a flashback of Rita and Zedd’s first encounter on Spearo V. Rita attacked Zedd on behalf of her father, Master Vile. During the battle Zedd throws Rita a proposition to join with him, seeing that she has outreached her father’s role for her.

Back at Safehaven, the Omega Rangers base, Both teams are having a conference call with Zordon and the earth based allies about what to do about Mistress Vile. In the conversation, it is deducted that Vile is looking for a way into the Morphin Grid but needs help doing it. The Rangers have some time to prepare knowing a Morphin Arch would be needed and one is revealed to be on Earth, which causes some tensions to be raised. Zordon orders the Power Rangers to return but not everyone is on board to comply to his orders.

The young heroes don’t even have an option to catch up and talk when suddenly Vile takes the fight right to their doorstep! How can they be ready for this surprise attack? It is a moment that readers will be excited to watch unfold. Even with a great cameo conversation and those huge action panels, nothing and I MEAN NOTHING will top what happens within the final moments of this issue and who is involved! It is a very safe bet to say that all of the Power Rangers fandom will be buzzing about the closing image from this issue.

Mighty Morphin Power Rangers #106

Creative: Melissa Flores, Simona Di Gianfelice, Raul Angulo, and Ed Dukeshire (Cover: Taurin Clarke)

Credit: BOOM! Studios

Mighty Morphin Power Rangers #106

Creative: Melissa Flores, Simona Di Gianfelice, Raul Angulo, and Ed Dukeshire (Cover: Taurin Clarke)

Credit: BOOM! Studios

Mighty Morphin Power Rangers #106

Creative: Melissa Flores, Simona Di Gianfelice, Raul Angulo, and Ed Dukeshire (Cover: Taurin Clarke)

Credit: BOOM! Studios

BREAKDOWN: Just when you think this run has already given readers all the surprises it can handle, Flores drops a HUGE final moment that no one is ready for! No spoilers on that as it is one to be witnessed and not ruined. As for the rest of the issue, the writing demonstrates the growing frustration Vile is causing within the Rangers unit. There are great character moments involving Tommy and Kimberly reflecting this. The reveal about the Morphin master ruins furthered the wedge even more. Vile’s attack has left even the most confident members of the Rangers team nervous as to what is to come. Pacing worked well giving the story breaks to focus on character moments, one of which builds toward the concluding image that is going to leave fans speechless.

Di Gainfelice does a great job balancing out the Rangers’ struggles with Vile’s moves with excellent action sequences. The personal conversation involving Tommy respectively will connect with readers as a reflection of their feelings of recent events. It’s levels out with the battle at Safehaven. The action panels waste no time speeding things along, showing how quickly Vile’s forces are moving. The art caps everything off with a high-effective parting shot to send readers the message that the stakes just got higher involving this conflict.

Mighty Morphin Power Rangers #106

Creative: Melissa Flores, Simona Di Gianfelice, Raul Angulo, and Ed Dukeshire (Cover: Taurin Clarke)

Credit: BOOM! Studios

Mighty Morphin Power Rangers #106

Creative: Melissa Flores, Simona Di Gianfelice, Raul Angulo, and Ed Dukeshire (Cover: Taurin Clarke)

Credit: BOOM! Studios

FINAL POINT: The impressive debut run from the creative team of Flores and Di Gianfelice (along with Angulo and Dukeshire) grows its’ legacy even more with their latest issue. Superb writing and art turns up the pressure on the Power Ranger teams with an even more ominous danger looming in the wings at this issue’s conclusion. If you haven’t checked this run out, make it a point to remedy that situation this week at the local comic shop!

Hit me up on ODPH social media and let me know what you thought of Mighty Morphin Power Rangers #106. Thanks for reading!

GRIM #9 (BOOM! STUDIOS)

Welcome to an all-new edition of Parlay Points, the comic book review blog for the ODPH podcast.

For this entry, we’re heading back to the afterlife with one of the biggest indie comics on the market today. The second story arc featuring Boom! Studios’ fan-favorite reaper continues to capture fans attention with more surprises and secrets looming on the horizon. Grim #9 by Stephanie Phillips, Flaviano, Rico Renzi & Tom Napolitano jumps right into last issue’s cliffhanger ending and welcome readers to a new threat entering the fray. Let’s not wait another minute and jump right in to the latest chapter, shall we?

*** POSSIBLE SPOILER WARNING ***

Living in Las Vegas should be an amazing time. Sadly, this is not the case for Jessica Harrow, a former reaper of the afterlife. After a routine soul guide mission goes wrong, Jessica finds herself crossing over into the land of the living and becoming the center of a bigger mystery that anyone realizes. This action leads Jessica and her friends Eddie and Marcel into a downward spiral pitting them in the line of fire of her aunt, Adira, who has her own reasons to keep Jessica away from finding the truth. Ultimately, Adira banishes Jessica and her friends into the land of the living in the aftermath of a battle between The End and Death himself (Jessica’s father).

Getting used to her new surroundings, Jessica tries enjoying a music festival but when people no longer can die and have a unique red marking on their foreheads, all signs point to Jessica being responsible. With Adira making moves to deal with Jessica, shes approached by the Sisters of Fate who have their own plan to fix things, none of which Jessica is on board with. When Jessica emerges from her meeting, she sees Marcel on his knees with a man and his ghost-esque giant Tiger behind him. Throw in the story of Jessica’s mother breaking of jail to find her daughter now and it’s a safe guess to whatever happens in Vegas isn’t staying in Vegas.

This issue opens up with Lilah, Jessica’s mother visiting a grave-site in Arizona. While there, she sees a hand emerge from the ground. Readers see that there is a possible connection to a red necklace she’s wearing, with a sense that it may have some powers radiating from it. The story then switches to Vegas where the city is filled with chaos and destruction. It is also noteworthy that the events here take place BEFORE the ending of issue #8. Eddie and Marcel are looking for Jessica when Annabel, a reaper approaches them. She questions the pair about Jessica’s involvement in Death’s demise and breaks down Adira’s plan to trap Jessica in Hell for eternity.

The pair are guided by Annabel into the first of eight gateways into Hell and encounter the being at the end of issue #8, with his giant tiger! Who is this mysterious figure? Why does he have a vested interest in Marcel? Readers don’t wait long to find out the secrets of Marcel and lead right into the ending of issue #8. Once Jessica arrives to meet them, the story of Marcel plays out. What won’t be expected is the ending point of this story. An action takes place that will impact Jessica moving forward while shaking things up before heading to this issue’s epilogue.

Phillips takes a small break from focusing on Jessica to showcase some of the other role players involved in this story. It’s an excellent way to see how dangerous of a foe the man with the tiger appears to be using Marcel’s story in such a unique fashion. Phillips also uses a creative method with the time jumps to not only establish Eddie and Marcel’s story but add an additional layer to last issue, giving readers a sense of how long she was gone with the Sisters of Fate. Pacing was great with structuring the stories of Lilah and Marcel with enough time to expand both with. Considering how many characters are featured, nothing felt lost in the shuffle and their stories never felt forced or out of place.

Flaviano’s depiction of a rioting Vegas immediately pops off the panels. The visuals play into the overall story of the second arc while not making it the center of attention. The introduction of the man and his tiger stands out as well, especially with the use of the coloring by Renzi. This shines with a panel having that person pop in and out of the shadows tormenting Marcel. The imagery is brooding and tragic and compliments the haunting writing. Flaviano gives readers an impactful punch in the feelings bringing the sad tale to the forefront. There is a great two page spread that perfectly sets up a full page visual to end that portion of the story. Lilah’s story also stands out being a change of pace to Jessica’s and adding more to her mysterious tale.

FINAL POINT: Grim #9 moves forward by showing readers how dangerous Jessica Harrow’s next obstacle is going to be thru the eyes of one of her friends. Excellent writing and artwork from Phillips, Flaviano and the team keeps the intrigue rising as new elements are mixed in with the overall themes lingering over the latest arc. It continues to be required reading on New Comic Book Day.

Hit me up on ODPH social media and let me know what you thought of Grim #9. Thanks for reading!

Grim #9

Creative: Stephanie Phillips, Flaviano, Rico Renzi & Tom Napolitano

All images Credit: Boom! Studios

INFERNO GIRL RED: BOOK ONE #3 (IMAGE COMICS)

Welcome to an all new edition of Parlay points, the comic book review blog to the ODPH Podcast!

For this entry, we’re at the conclusion of a break-out series from comics most exciting line: The Massive-Verse from Image Comics via Black Market Narrative. INFERNO GIRL RED: BOOK ONE #3 by MAT GROOM (Power Rangers, Ultraman), ERICA D’URSO (The Mighty Valkyries), IGOR MONTI & BECCA CAREY brings to comic shops the conclusion of the introductory story of Cassia Costa. Breaking down the Kickstarter volume into three issues has been no easy task but the series has been winning over fans month after month since its’ initial release via Image. Last time readers saw Cassia, Apex City is still reeling from the attack of the Griffin while Cassia has one of her biggest fears unfold right before her eyes. How do things fare in this final installment of Book One? Let’s take a closer look and see how the latest series of the Massive-verse concludes its’ spectacular debut, shall we?

INFERNO GIRL RED: BOOK ONE #3

Creative: MAT GROOM, ERICA D’URSO, IGOR MONTI & BECCA CAREY 

Credit: Image Comics via Black Market Narrative

*** POSSIBLE SPOILER WARNING ***

Going away to school was expected to be a life-changing event, but even Cassia Costa didn’t expect how fast things would change when she arrived at the Helix Campus. Being a new student at the prestigious school in Apex City carries enough weight, but becoming the surprising beacon of hope and the only line of defense against the Griffin might be too much to bare.

When danger struck as the Griffin caused the entire foundation of Apex City to rise, fate found Cassia in the form of a red object that activitied her fire inside becoming the hero INFERNO GIRL RED! With the assistance of her mother, Ana and her roommate Harriette, Cassia has faced down the Griffin’s forces until a showdown between them proved too much for Cassia to handle. Rebounding from the encounter, Cassia is lured out to face the threat while the Griffin kidnaps her mother, leaving Cassia is a state of sheer defeat.

This issue opens up with Harriette returning to their dorm room and seeing Cassia crying over the disappearance of her mother. Cassia opens up to Harriette about how her mother was on to the Griffin’s ways and she was disgraced to the point Cassia’s father left them both. Feeling truly alone, Harriette provides comfort and confidence standing by Cassia’s side during this time of need and reminding her what truly makes her a hero. The conversation results in Cassia revealing her superhero identity, which Harriette already deciphered.

The pair then discuss plans to stop the Griffin once and for all. With an assist from a fellow student, they find a location where a tremendous amount of power is being used. Cassia prepares to head to the location, ready to overcome the odds and be the hope that Apex City needs in this time of crisis.

At this stage, The Griffin addresses Cassia’s mother and his identity is revealed to the readers. Once Cassia arrives, the final showdown begins! Readers are ringside for a battle of the ages as Cassia goes toe-to-toe with an adversary who Cassia has no choice but to defeat with the lives of her mother and residents of Apex City hanging in the balance.

The conclusion doesn’t leave both combatants unscathed. It leaves readers filled with ranging emotions. Once the battle has passed, the final moments offer a satisfying conclusion to the inaugural chapter of the Massive-Verse’s latest hero.

BREAKDOWN: Groom leaves readers with an exciting ending to Cassia’s first solo story. At the core of this tale has been the concept of hope. It truly is Cassia’s super power. Once she believes that she can accomplish the impossible, Cassia proves that powers never made her a hero in the first place. Groom showcases Cassia as a determined character who faces her fears and doubts head-on. This portion of the story shows her growth in believing as she needs to find the fire inside her to push forward with the absence of her mother as her normal guide. This becomes even more apparent with the showdown with the Griffin. Having been previously defeated, Cassia needs to push herself beyond her fears know what failure could mean. The resolution of the battle magnifies how important it was to win and sends off Cassia’s world with a compelling good-bye (for now…)

D’Urso’s art amplifies the intensity of the final battle to incredible levels. The action panels hold readers’ attention and never lets go with its non-stop pacing. This has been a staple of this book since its’ inception. D’Urso brings a vibrant energy to the series which reflects the optimism and hope Cassia has (with much praise going to Monti & Carey to amplify these panels). D’Urso also brings out the deeply emotional elements of Cassia’s world. The moments she shares with her mother and Harriette show readers the power of self-belief can overcome insurmountable odds.

FINAL POINT: Groom, D’Urso and the team have not only made a highly enjoyable superhero story, Through their work, they’ve reminded comic readers what makes a hero isn’t the powers they have, but the fire inside that gives them the courageous drive to be heroic. The series is a must-add to your collection and you can’t leave the local comic shops this week without a copy.

Hit me up on ODPH social media and let me know what you thought of Inferno Girl Red: Book One #3. Thanks for reading.

X-O MANOWAR UNCONQUERED #1 (VALIANT ENTERTAINMENT)

Welcome to an all new edition of Parlay Points, the comic book review blog to the ODPH podcast!

For this entry, we’re returning to the Valiant Entertainment Universe and checking out an exciting new series starring its flagship character. The last time readers had seen Aric of Dacia and his living armor Shanhara in their own series, it was 2021. Since that point, it’s been relatively quiet for the iconic character with a few exceptions. One noteworthy showing was Aric guest appeared in the latest Mature readers rated BLOODSHOT: UNLEASHED series. Now 30 years after his debut, Valiant has lined up an incredible creative team to craft the latest tale. X-O MANOWAR UNCONQUERED #1 by BECKY CLOONAN, MICHAEL W. CONRAD, LIAM SHARP & TROY PETERI looks to present a challenge unlike any that Aric has faced before! Let’s not wait any longer and see what’s unfolding here, shall we?

X-O MANOWAR UNCONQUERED #1

Creative: BECKY CLOONAN, MICHAEL W. CONRAD, LIAM SHARP & TROY PETERI

Credit: Valiant Entertainment

*** POSSIBLE SPOILER WARNING ***

Aric of Dacia has been a walking war machine since being introduced to readers 30 years ago in the debut of the Valiant Universe. After crossing paths with an alien race known as The Vine, Aric’s only chance to fight back and surviving was becoming one with a conscious armor known as Shanhara. Together, they are the powerful force known as X-O Manowar. Their escapades are the story of legend when talking about the Valiant Universe. Bloodshot might have a higher profile with some pop culture fans, but rest assured, there is only one franchise character of Valiant.

This story opens up with a voice narrating the latest battle involved with the heir to the Visigoth throne. Readers witness a brutal aftermath with X-O standing tall over his enemies. Those witnessing the scene are given a decree from both Shanhara and Aric. The message is clear: The next time one faces them both, they will be experiencing the wrath of X-O Manowar.

This frightens the onlooker who shifts her attention to present time. She sees X-O flying in space directly into the path of a comet heading straight towards Earth! The conversation between Shanhara and Aric shifts dramatically as Aric is preparing to die from this mission while Shanhara is saying how worthy Aric has been while downplaying his perceived future. At the moment of impact, Aric sees his life flash before his eyes. The explosion is huge and sends Aric spiraling.

From here, X-O crashes down on a new planet, questioning why Shanhara kept him alive. Shanhara explains the comet is more than what they thought. Aric assess the new surroundings and christens it “Scythia”. With a new home (for now), Aric looks to make the most of their time healing. However, the best laid plans are too good to be true. What of the onlookers spying on X-O? Is Scythia too good to be true? Readers get some new information before heading into a final act with a closing image to solidify Valiant’s armored gladiator has returned in epic fashion.

X-O MANOWAR UNCONQUERED #1

Creative: BECKY CLOONAN, MICHAEL W. CONRAD, LIAM SHARP & TROY PETERI

Credit: Valiant Entertainment

X-O MANOWAR UNCONQUERED #1

Creative: BECKY CLOONAN, MICHAEL W. CONRAD, LIAM SHARP & TROY PETERI

Credit: Valiant Entertainment

X-O MANOWAR UNCONQUERED #1

Creative: BECKY CLOONAN, MICHAEL W. CONRAD, LIAM SHARP & TROY PETERI

Credit: Valiant Entertainment

BREAKDOWN: Cloonan and Conrad play heavy into the strengths of Aric and Shanhara’s relationship. Aric comes across as challenging and unwavering while Shanhara plays into being the positive voice of reason to balance the pair out. This becomes apparent once the pair lands on Scythia. After seeing his life flash before his eyes, Aric isn’t so ready to head back to Earth while Shanhara presses him to focus on heading back and healing himself internally. The antagonists look to help Shanhara’ case as they present the spark needed to bring Aric out of his self-loathing. The story flows very well leading into it’s closing moments with an exclamation point liner to conclude the engaging debut of X-O Manowar’s latest adventrue.

Surprise to no one, Sharp’s art is bold, dramatic, and powerful. From the opening moments, the feel is set to the readers at how Aric’s current journey will enfold. The panel sequence dealing with the direct before and after the comet comes across as larger than life. There’s a great near-full page of a creature on Scythia that gives an instant danger to Aric. Moments like this give the story an extra shot of energy that any other artist might not hit as hard as Sharp did. The final panel plays into the weight of the last line delivered, finishing the initial chapter off with a strong flair.

X-O MANOWAR UNCONQUERED #1

Creative: BECKY CLOONAN, MICHAEL W. CONRAD, LIAM SHARP & TROY PETERI

Credit: Valiant Entertainment

X-O MANOWAR UNCONQUERED #1

Creative: BECKY CLOONAN, MICHAEL W. CONRAD, LIAM SHARP & TROY PETERI

Credit: Valiant Entertainment

FINAL POINT: Valiant’s King isn’t dead, long live its’ King! X-O Manowar Unconquered #1 holds nothing back as it reminds old and informs new readers of why Aric of Dacia and his partner of armor have become an iconic pair over thirty years of stories. Cloonan, Conrad, Sharp and the team go all in presenting the latest saga with exceptional writing and incredible art. You’re not going to want to miss this book on New Comic Book Day.

Hit me up on ODPH social media and let me know what you thought of X-O Manowar Unconquered #1. Thanks for reading.

ASK FOR MERCY: THE CIRCLE OF TIME #6 (COMIXOLOGY ORIGINALS)

Welcome to a brand new edition of Parlay Points, the comic book review blog for the ODPH podcast.

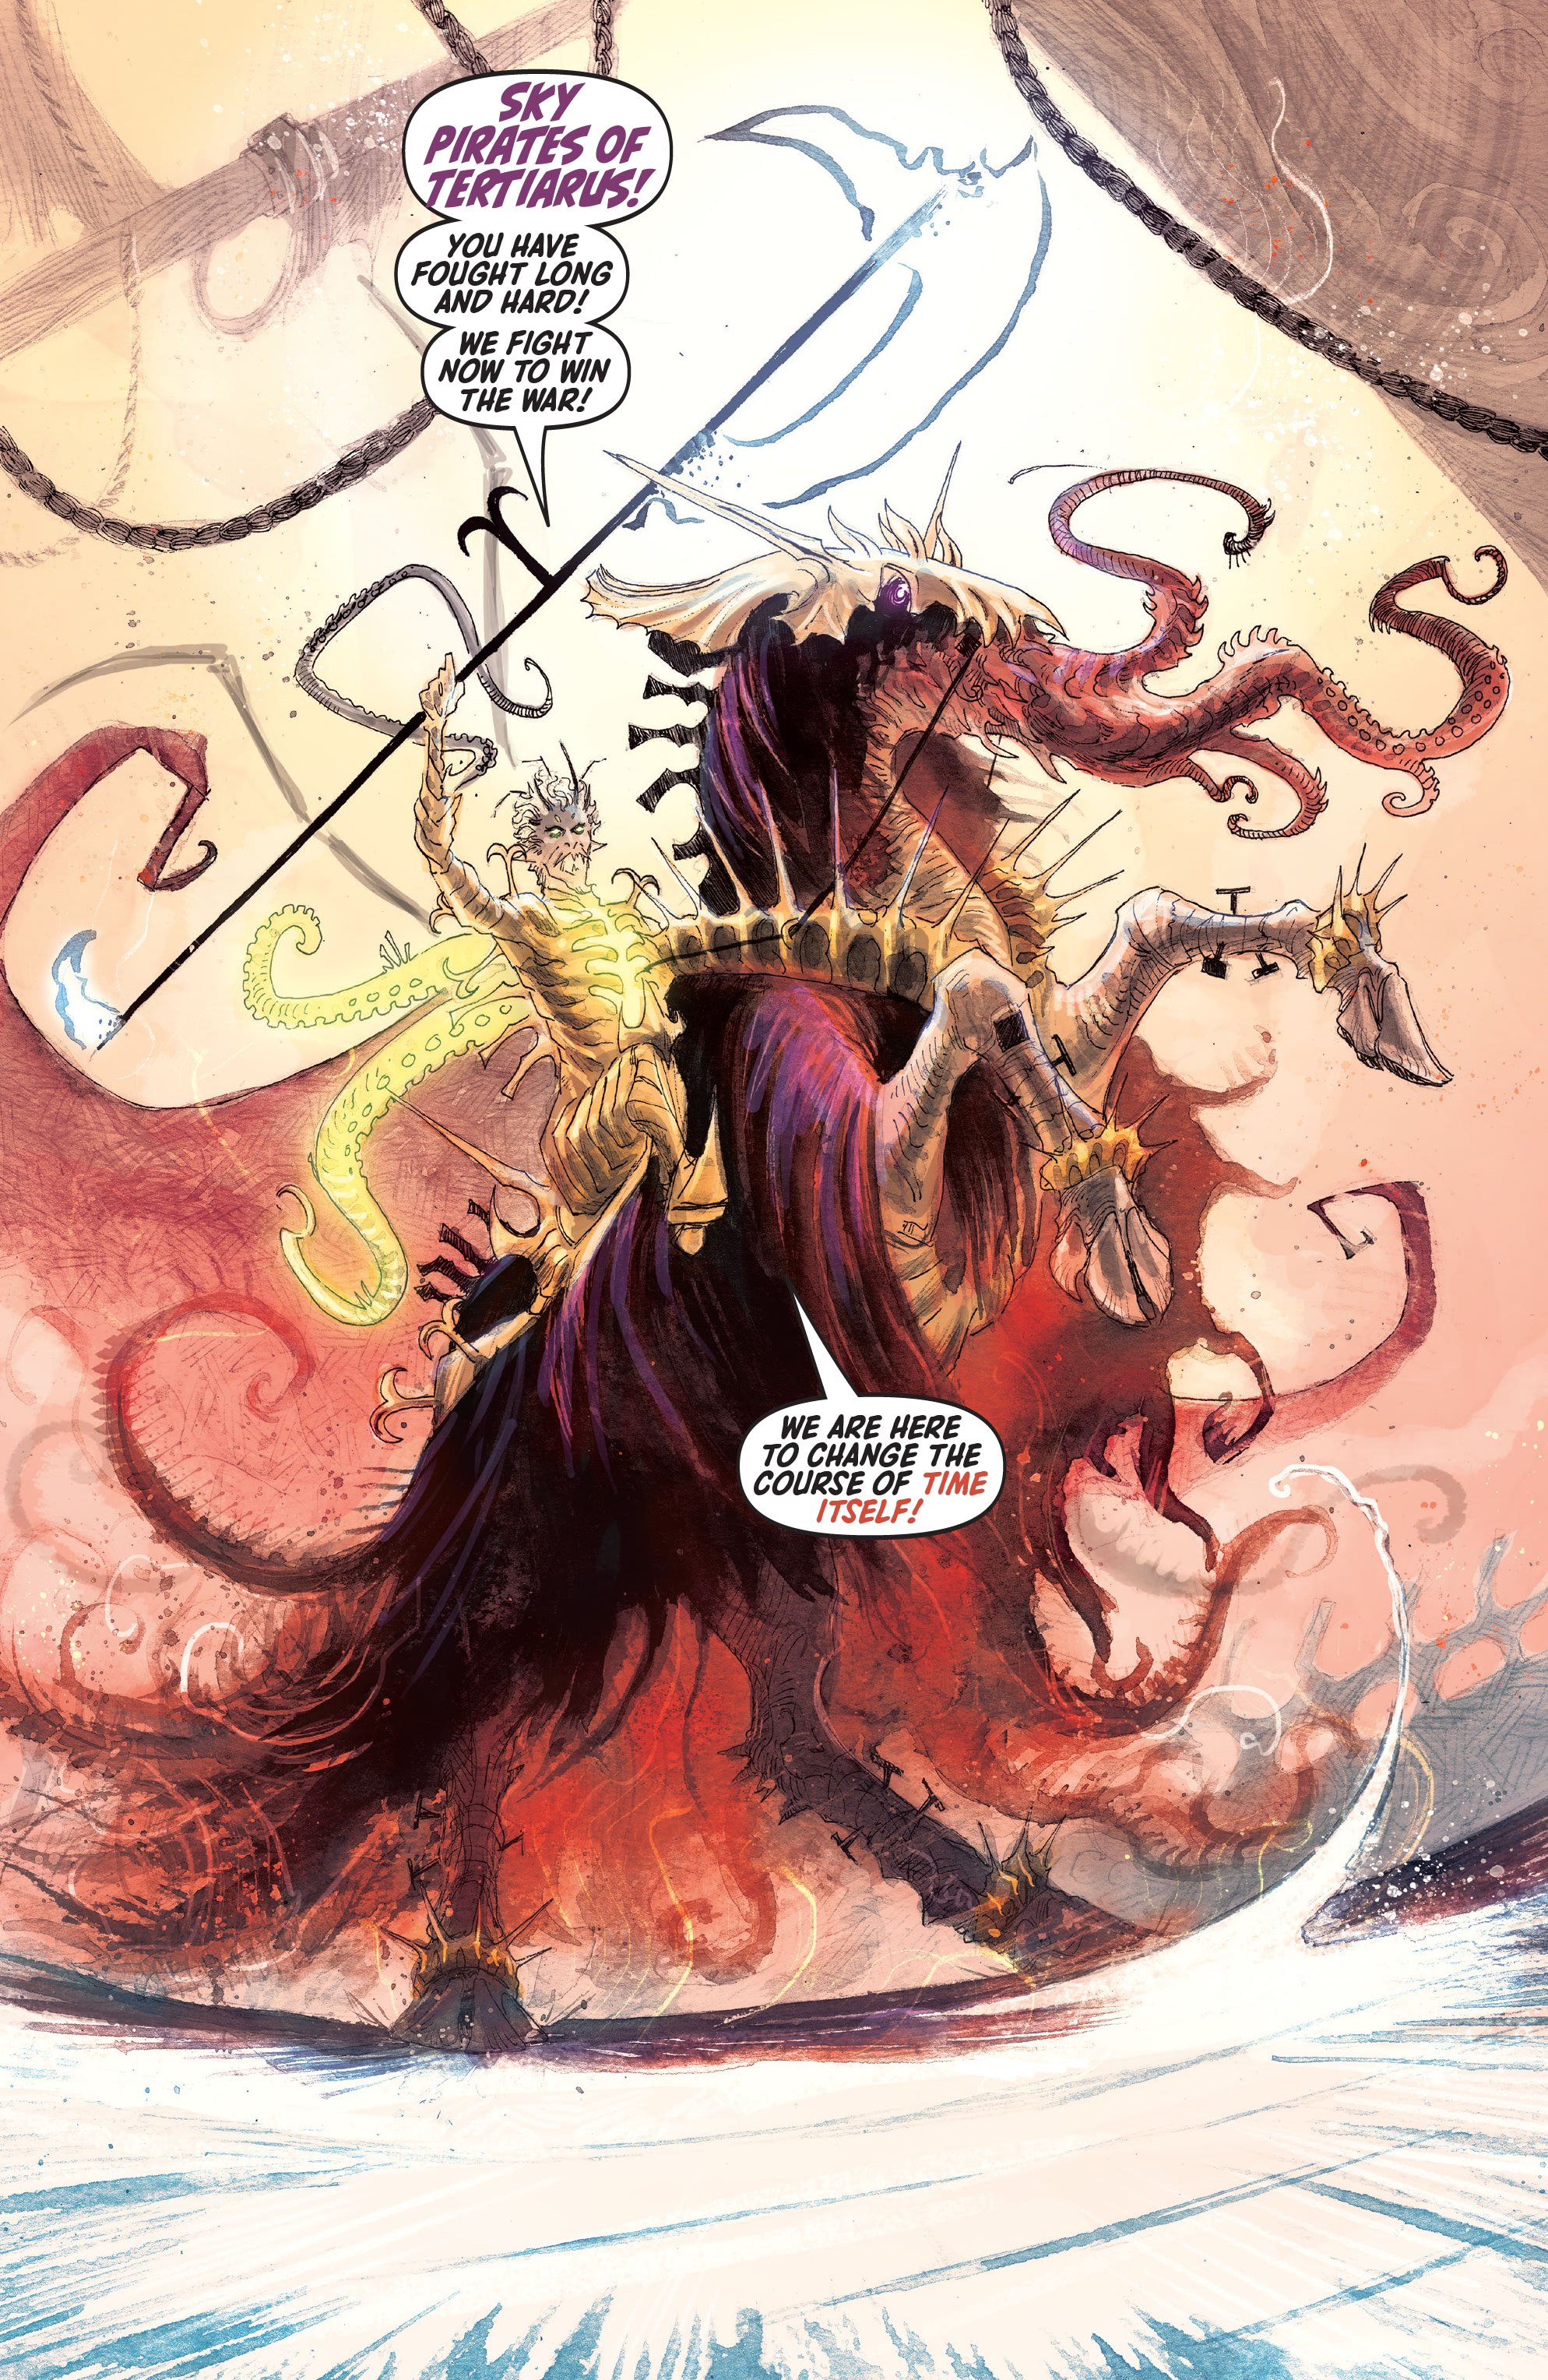
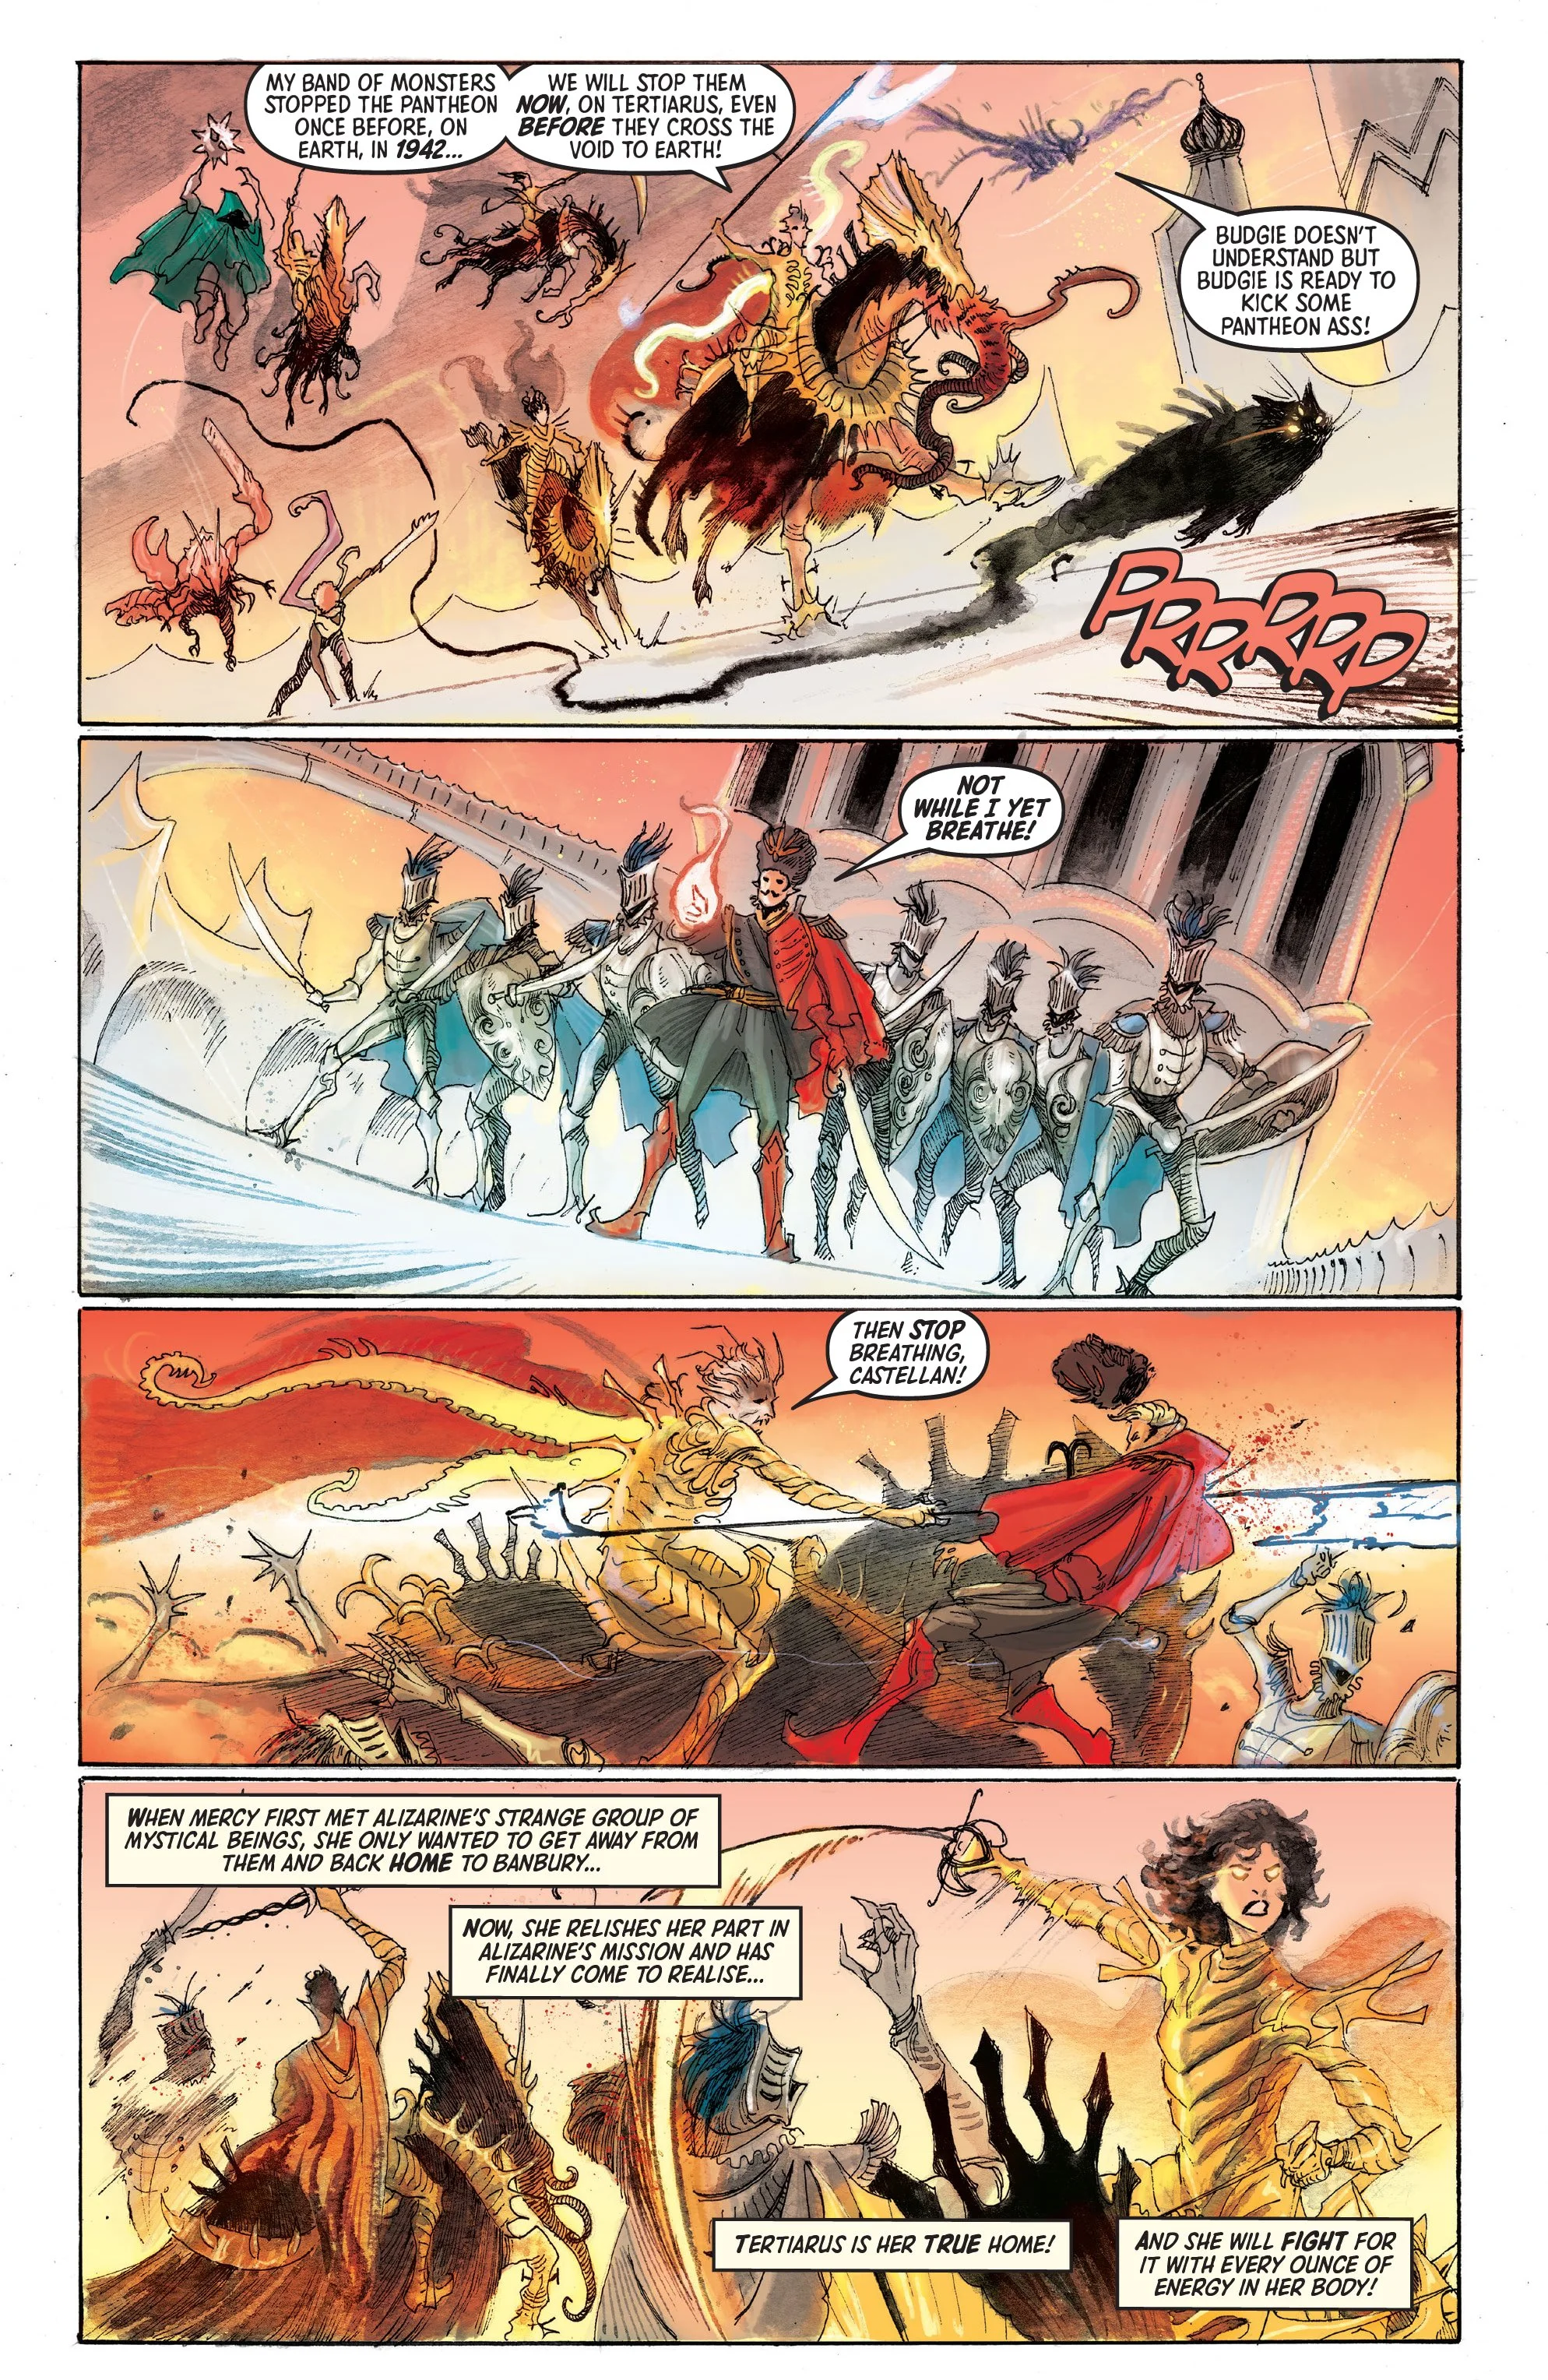
For this entry, it's season finale time for one of ComiXology Originals's most imaginative series. Ask for Mercy: The Circle of Time #6 by by Richard Starkings and Abigail Jill Harding brings a close to the (literally) time splitting tale that has taken readers on quite the ride. How do things fare for Mercy and Alizarine versus the evil Kroach? Let's take a deeper dive and see how things wrap up this season.

Ask For Mercy: The Circle Of Time #6

Creative: Richard Starkings and Abigail Jill Harding

Credit: Comixology Originals

Ask For Mercy: The Circle Of Time #6

Creative: Richard Starkings and Abigail Jill Harding

Credit: Comixology Originals

*** POSSIBLE SPOILER WARNING ***

The story of Mercy is a complex one to say the least. Being selected to fight monsters spawned from pure evil isn't something that happens every day. Four seasons later and Mercy's life hasn't slowed down since. This season has been a story on two fronts. Mercy’s allies, Ratmir and Jill Anderson, have been making plans while having a young girl named “Becky” in their care. Becky’s big secret is she’s a younger version of Mercy! Unfortunately, when they made a time jump after escaping a tight situation, they missed the mark and landed 20 years late and off course in 2007. That said, Jill has taken it upon herself to start actions that should have big ramifications later.

Meanwhile on the planet Tertiarus (& 65 years prior), a grown up Mercy and Tertiarus protector Alizarine have become entangled with space pirate Absolm Mooncrow while facing off with the Kroach. Alizarine makes a revelation of his connection with the Deathless and powers up Mercy and Mooncrow”s crew with infusing them with dangerous enegry. In its aftermath with the Harvester, The misfit group of warriors make a call to take down the infected Pantheon of Tertiarus before they make way to Earth and invade!

This issue opens up in Banbury, England 2007, where Ratmir and Anderson landed. It is at this moment, Mercy (of this time) sees Budgie, a fan-favorite ally, lying beaten in the backyard of her grandmother’s house. Puzzled by what has happened, Becky asks Budgie what happened.

At this moment, the story shifts to the capital of Tertiarus as Alizarine is leading the heroes into battle. The looming battle weighs on Alizarine, as his meddling caused the Pantheon’s initial downfall and might provide forgiveness for his actions. With a thunderous cry, the battle has begun. The action is high paced and with stakes this high, readers will be locked in to who’s left standing at the end.

Once inside the capital, Quinacridona and the Pantheon await Alizarine and his forces. It is as epic of a battle as readers should expect. There are many moments within these panels that give clarity to the mystery of Mercy. It is a small break in the action but plays a big part elevating the emotions running thru the characters. Choices are made that have dramatic repercussions for everyone on Tertiarus and Earth.

When the smoke clears, the resolution will completely change the course of events. No spoilers here but trust me, there are some events that readers will need to brace for. The epilogue ties both season four stories together and caps off a series that leaves a new status quo in its wake.

Ask For Mercy: The Circle Of Time #6

Creative: Richard Starkings and Abigail Jill Harding

Credit: Comixology Originals

Ask For Mercy: The Circle Of Time #6

Creative: Richard Starkings and Abigail Jill Harding

Credit: Comixology Originals

Ask For Mercy: The Circle Of Time #6

Creative: Richard Starkings and Abigail Jill Harding

Credit: Comixology Originals

BREAKDOWN: Starkings delivers on a finale that lives up to the hype. The battle of Tertiarus never stops from having the energy of grave consequences for Mercy. Readers can instantly connect with the pressure to secure victory at all costs. How events play out is a great bonus to where the story moved. It’s not a happy ending in the traditional sense. The main characters involved on Tertiarus all make difficult choices for their causes. Starkings makes this finale a tragic tale in some sense but one wrapped in hope for the future in the franchise.

The visuals done by Harding gives the finale a strong aura for its conclusion. There are a few full panel pages that put a huge statement on the drama unfolding in those moments. Alizarine leading the charge into the Tertiarus capital is a defining example of this. Those moments stand out as key points of the story. These are balanced out by the emotional reactions to the events of the battle. At no point did the battle stray from delivering on its major points. The epilogue featured more reaction based images but played into capping things off for this stage of Mercy and her story.

Ask For Mercy: The Circle Of Time #6

Creative: Richard Starkings and Abigail Jill Harding

Credit: Comixology Originals

Ask For Mercy: The Circle Of Time #6

Creative: Richard Starkings and Abigail Jill Harding

Credit: Comixology Originals

FINAL POINT: Stakings and Harding pull out all the stops for the finale of Ask For Mercy season four. The storytelling and imagery gives readers a legendary conclusion of the battle for Tertiarus with high-paced action and heartbreaking fallout. When it was all said and done, the Circle of Time made for an captivating story that comic readers need to check out.

Hit me up on ODPH social media and let me know what you thought of Ask For Mercy: the Circle Of Time #6. Thanks for reading.

BLACK CLOAK #3 (IMAGE COMICS)

Welcome to an all new edition of Parlay Points, the comic book review blog to the ODPH Podcast!

For this entry, the mystery grows deeper for Detective Phaedra Essex in the pages of Image Comics’ new hit series. Black Cloak by Kelly Thompson, Meredith McClaren and Becca Carey has been an excellent read thus far combing elements of true crime and fantasy. It immediately went back to print due to overwhelming fan support. The layers behind the death of the heir apparent to the throne of Kiros have slowly started their reveal. After last issue’s conclusion, tensions are running high, putting the city on edge. Let’s see where the latest chapter takes us, shall we?

Black Cloak #3

Creative: Kelly Thompson, Meredith McClaren and Beccy Carey

Credit: Image Comics

*** POSSIBLE SPOILER WARNING ***

The mystery surrounding Black Cloak centers around the death of Freyal III of Sidra. He was found dead inside an apartment in a questionable part of Kiros known as the Narrows. Being part of Kiros’s Elf royal family, this death has garnered wide-spread attention. If that wasn’t enough, there are two other deaths possibly connected to this case. Now tasked to solve this case are Black Cloaks (Kiros Law Enforcement) Phaedra Essex and Pax. Their journey to solve this case and keep Kiros (the last city in the known world) from the brink of chaos has been challenging to say the least. Factor in Phaedra’s personal connection to Freyal and things have become dangerous. From interviewing potential suspects to meeting with the Queen herself, Phaedra has become a target. There have been multiple attempts to kill Phaedra but that hasn’t slowed her and Pax down from trying to solve the case.

Last we saw Phaedra, she returned to her apartment with the Kiros Three waiting for her. They are considered the most powerful Humans in Kiros. Knowing that Freyal’s death now could cause an enormous power shift from Elves to Humans, Phaedra’s guard is up for their true motives. They give Phaedra a possible break in the case which sends her rushing out to meet up with Pax on figuring out their next move with the new information.

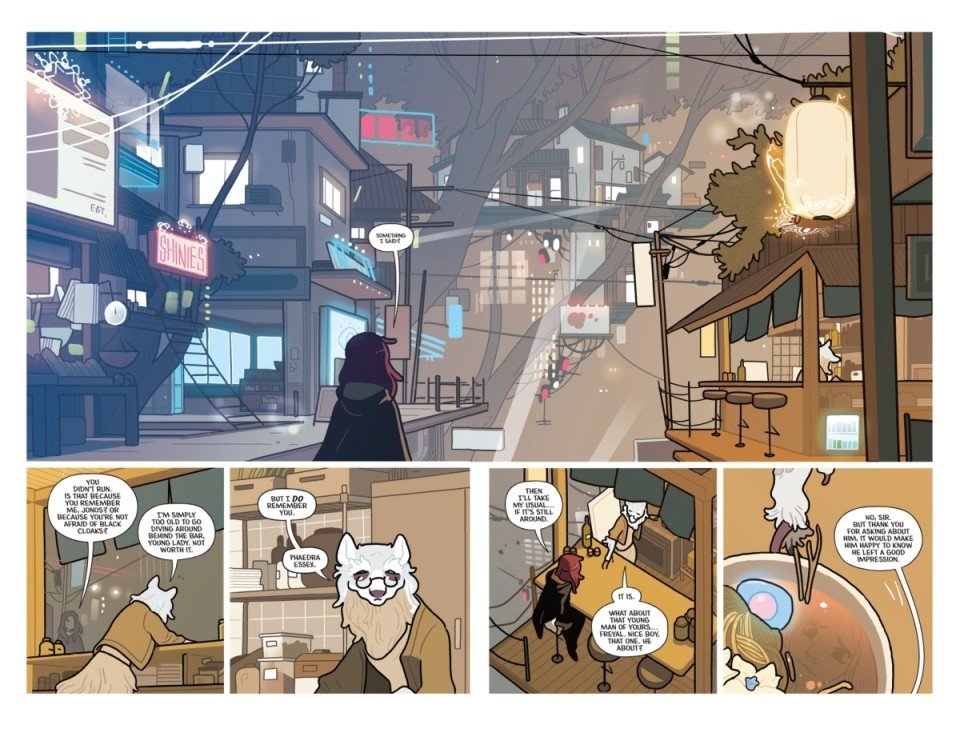
his issue kicks off with Phaedra making her way through “The Trees”, a section of Kiros. The residents all cower away seeing a Black Cloak wandering the streets. She makes her way to meet Pax at a local establishment to form their plans. Phaedra talks about a place where Freyal might have left a message. Pax begins pleading with Phaedra to open up about what she knows since she has been keeping things from him. When Phaedra finally mentions a few clues, Pax is shocked to hear who gave the latest lead, realizing what that could mean. Pax and Phaedra discuss the Kiros Three’s plea of innocence and how they’re shifting blame to the Dracona, whose unique blades have been used in attacks on Phaedra.

The pair take off to check out a hidden location of Phaedra and Freyal’s past. What they find there is a message left that no one will be suspecting. What is left at the magical hiding spot? How is the case impacted moving forward? Readers witness how this sequence sends the pair into the path of someone whose words impact Phaedra to gamble on the future of the case heading into the issue’s final moments.

Black Cloak #3

Creative: Kelly Thompson, Meredith McClaren and Beccy Carey

Credit: Image Comics

BREAKDOWN: Thompson presents a strong pull on Phaedra’s relationships in this issue. The first time involves the distance Pax notices in revolving around the case. It plays in presenting how distracted Phaedra might be with her heavily emotional tie to Freyal. The second and arguably biggest one is her reaction to what she finds in the magical hiding spot. Thompson crafts that sequence where it doesn’t only impact Phaedra but leaves readers with a somber reaction. The final one is the latest person of interest. The conversation becomes a driver for the next stage in the case but gives perspective that the world of Krios isn’t as cut and dry as it seems. All three of these sequences tie together brilliantly to move the story forward.

McClaren and Carey bring the fantasy world to life with vivid imagery. The initial opening pages showcases the various residents of the Trees and gives this section of Kiros its’ on unqiue feel. It’s a strength to the art team on giving each area a distinct energy which plays perfectly off the writing. The back and forth between Phaedra and Pax demonstrates the partner’s longtime connection while featuring how this case is ultimately wearing on them. The best example is after they hear what’s left for them at the hiding spot. Phaedra and Pax don’t hide their feeling in a brief panel, but one that stands out for their facial reactions. The final moments are capped off by an excellent one page ending panel to take readers on the next stage of the mystery.

Black Cloak #3

Creative: Kelly Thompson, Meredith McClaren and Beccy Carey

Credit: Image Comics

FINAL POINT: Black Cloak continues to push forward with its’ detailed fantasy mystery that needs to be a main-stay on all comic readers pull lists. Thompson, McClaren and Carry shift focus onto Phaedra Essex’s mounting challenges with superb writing and imagery. Don’t miss this latest chapter when you’re at the local comic shop this week!

Hit me up on ODPH social media and let me know what you thought of Black Cloak #3. Thanks for reading.

HOUSE OF SLAUGHTER #13 (BOOM! STUDIOS)

Welcome to a brand new edition of Parlay Points, the comic book review blog for the ODPH Podcast!

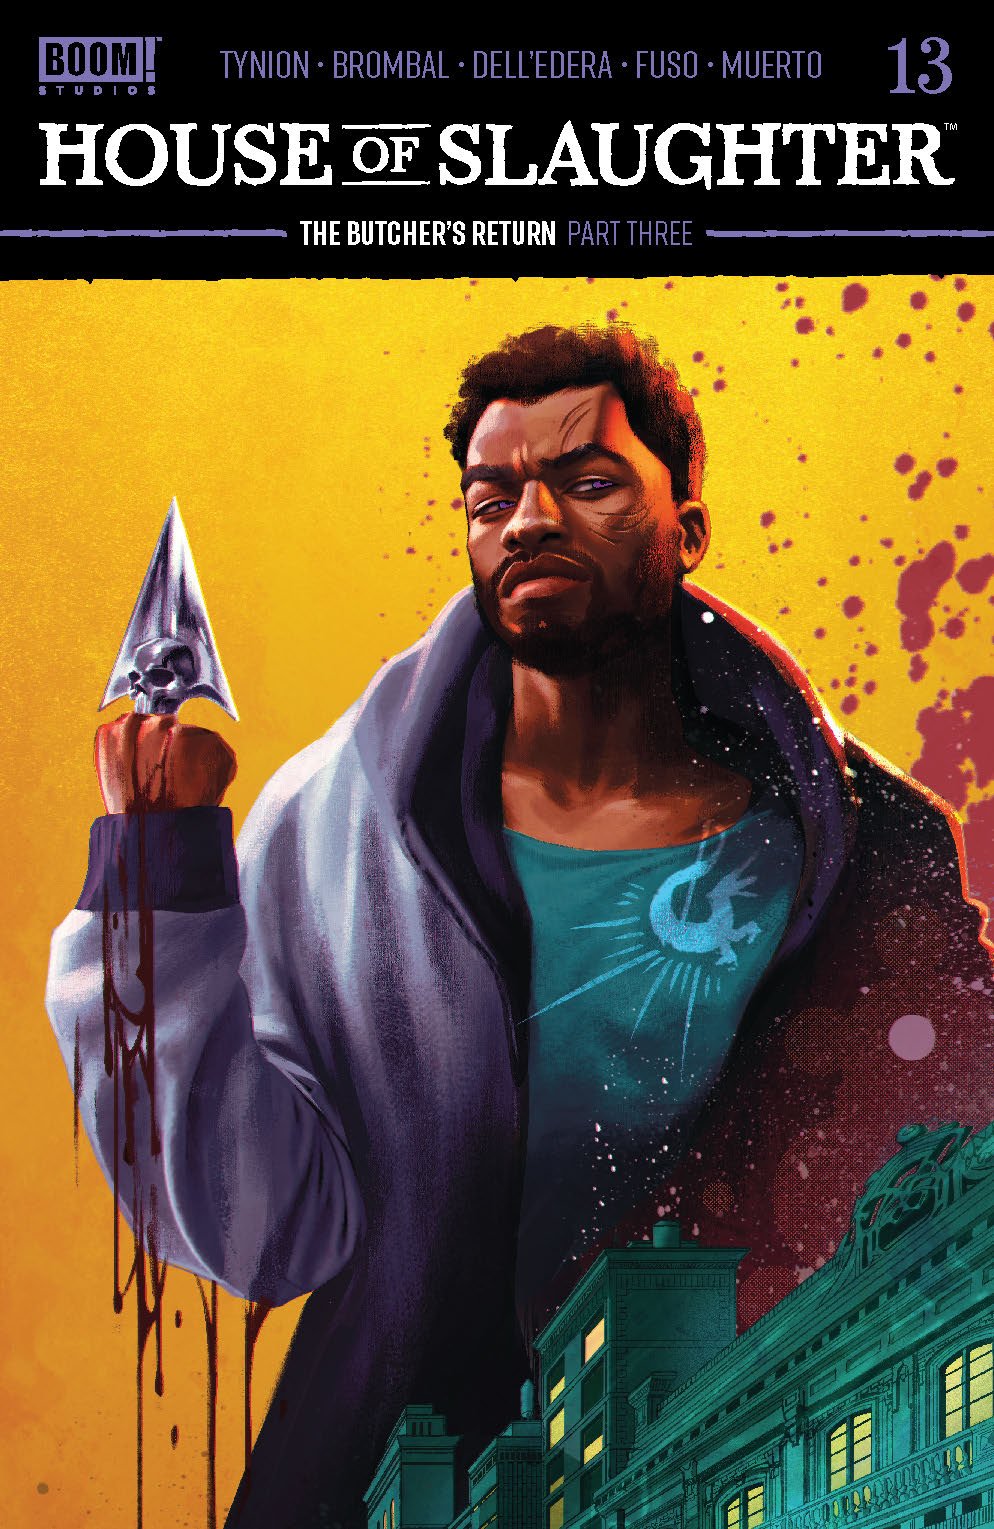
For this entry, we’re continuing to follow the latest installment of the spin-off series from BOOM! Studios’ hugely successful comic: Something is Killing The Children. HOUSE OF SLAUGHTER #13 by Tate Brombal, Antonio Fuso, Miguel Muerto and Andworld Design (Series Development: James Tynion and Deisgns and Development: Werther Dell’edera) continues onward the story of Jace Boucher aka The Butcher. With more eyes swinging over to the SIKTC franchise due to the Netflix adaptation announcement, this series is heating up at the right time. Let’s take a deeper dive about the latest chapter, shall we?

HOUSE OF SLAUGHTER #13
Creative: Tate Brombal, Antonio Fuso, Miguel Muerto and Andworld Design (Series Development: James Tynion and Deisgns and Development: Werther Dell’edera) - Cover: Mateus Manhanini
Credit: BOOM! Studios

HOUSE OF SLAUGHTER #13
Creative: Tate Brombal, Antonio Fuso, Miguel Muerto and Andworld Design (Series Development: James Tynion and Deisgns and Development: Werther Dell’edera) - Cover: Mateus Manhanini
Credit: BOOM! Studios

*** POSSIBLE SPOILER WARNING ***

House of Slaughter is an anthology series, having self-contained stories involving characters set in the SIKTC Universe. In this recent arc, Jace Boucher’s life post monster hunting hasn’t gone exactly the way he envisioned. As seen in the first HoS arc, Jace’s doomed love with Aaron Slaughter still weighs heavy on him (even without knowing Aaron’s fate). Jace has assumed the role of protector for orphans and is laying low off the radar, hoping to escape his past. This proves to be a lost cause Sunny, one of the orphans, wants to follow in the hunter footsteps of Jace. When he’s told not to, Sunny becomes rebellious and leaves the camp set up for Jace and the orphans. When a monster comes across Sunny, he is rescues by a person with history with Jace: Jolie Boucher.

During the rescue, Jolie is trying to sell Sunny the dream of being a hunter. Jolie mentions that the monster they encountered has more baby creatures lying around and she takes Sunny under her wing and brings him along for a hunt with her house. Sunny becomes mesmerized by what he sees and is invited for dinner at her mansion home, “The Butcher Shop”. All the while, Jace is tying to track Sunny down while dealing with some unsettling visions and dreams. Once he sees Sunny leave with Jolie, Jace realizes the stakes have become even higher.

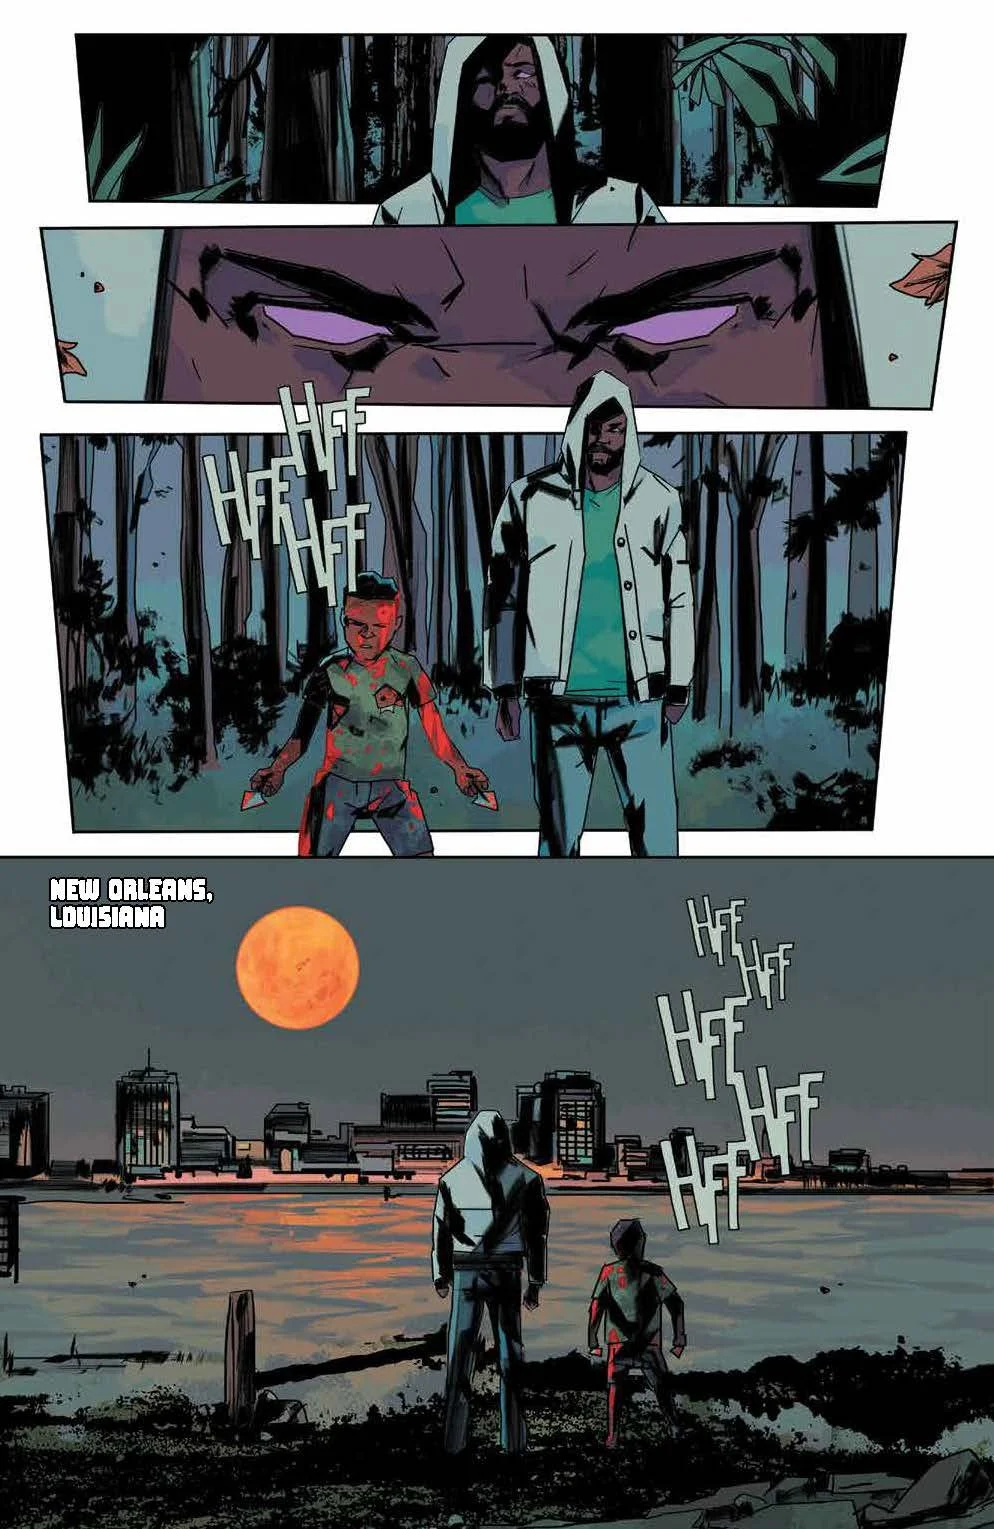
This issue kicks off with a flashback sequence as Jace prepares to return to New Orleans in search of Jolie and Sunny. The moment switches to when Sunny walks into the mansion (due to Jolie manipulating the young boy). Once inside, Sunny sees some of the house residents such as Rene and Vionette Boucher. SIKTC readers will recognize a certain hunter roaming the halls as well Maxine Slaughter! The last time readers had seen Maxine, she was making a big move in the pages of the “Book Of Slaughter” one-shot, which is a great reference point for new readers to the SIKTC world. With Sunny invested in meeting the people of the house, Jolie convinces him that she will take him back to Jace’s camp in the morning.

Meanwhile, Jace is making his way through New Orleans when he has a flashback to a childhood moment with Jolie. This has been an ongoing plot point since the story arc began. This recent memory is interrupted by a raven, which Jace recognizes and quickly runs toward. The bird leads him to a mysterious character named Maven, who warns Jace of what’s ahead. Will the warning be enough? Is Jace ready for what he is about to encounter? Readers will get some clarity with those questions but will have to brace for what is in store for Sunny living in a house full of hunters with a strong final act in this issue to conclude this issue on.

HOUSE OF SLAUGHTER #13
Creative: Tate Brombal, Antonio Fuso, Miguel Muerto and Andworld Design (Series Development: James Tynion and Deisgns and Development: Werther Dell’edera) - Cover: Mateus Manhanini
Credit: BOOM! Studios

HOUSE OF SLAUGHTER #13
Creative: Tate Brombal, Antonio Fuso, Miguel Muerto and Andworld Design (Series Development: James Tynion and Deisgns and Development: Werther Dell’edera) - Cover: Mateus Manhanini
Credit: BOOM! Studios

HOUSE OF SLAUGHTER #13
Creative: Tate Brombal, Antonio Fuso, Miguel Muerto and Andworld Design (Series Development: James Tynion and Deisgns and Development: Werther Dell’edera) - Cover: Mateus Manhanini
Credit: BOOM! Studios

HOUSE OF SLAUGHTER #13
Creative: Tate Brombal, Antonio Fuso, Miguel Muerto and Andworld Design (Series Development: James Tynion and Deisgns and Development: Werther Dell’edera) - Cover: Mateus Manhanini
Credit: BOOM! Studios

BREAKDOWN: Brombal keeps readers guessing as to what Jolie’s overall plan is for Sunny. Considering their history, it makes perfect sense to hurt Jace by stealing away one of his children and having them join the life he has been so desperate to escape. The influence of giving the young boy his dream is easy for Jolie to use to her advantage. Jace knows this and risks everything to try stopping it. Seeing Maven and their conversation adds more drama to the upcoming moves. It’s low-key but readers can sense the doubt in Jace’s voice heading into the inevitable confrontation. Pacing worked well in giving enough time to set up the stage for the final act. The flashback/dream sequences were used less than the previous issues but this method helped keeping things moving without taking away from Jolie and Sunny’s spotlight. The final moments will be interesting to see the fallout next issue, but left a satisfying conclusion for this chapter.

Fuso focused on displaying “The Butcher Shop” as a warm and friendly place while hiding most of its secrets. This plays well int Jolie’s schemes as her subtle smirks conceal what she has in store for Sunny. Seeing the interactions with the other residents especially with the cameo from Maxine helps break up some tension before shifting back to Jolie and Jace. Jace’s flashbacks and ultimate interruption set things up nicely for his portion of the issue. Excellent full page panel to cap off the Maven sequence. The final act moved fast with Sunny but illustrated the situation he’s in and what lies ahead. It concluded the scheming of Jolie, giving fans much to be excited to see where the story goes next issue.

HOUSE OF SLAUGHTER #13
Creative: Tate Brombal, Antonio Fuso, Miguel Muerto and Andworld Design (Series Development: James Tynion and Deisgns and Development: Werther Dell’edera) - Cover: Mateus Manhanini
Credit: BOOM! Studios

HOUSE OF SLAUGHTER #13
Creative: Tate Brombal, Antonio Fuso, Miguel Muerto and Andworld Design (Series Development: James Tynion and Deisgns and Development: Werther Dell’edera) - Cover: Mateus Manhanini
Credit: BOOM! Studios

HOUSE OF SLAUGHTER #13
Creative: Tate Brombal, Antonio Fuso, Miguel Muerto and Andworld Design (Series Development: James Tynion and Deisgns and Development: Werther Dell’edera) - Cover: Mateus Manhanini
Credit: BOOM! Studios

HOUSE OF SLAUGHTER #13
Creative: Tate Brombal, Antonio Fuso, Miguel Muerto and Andworld Design (Series Development: James Tynion and Deisgns and Development: Werther Dell’edera) - Cover: Mateus Manhanini
Credit: BOOM! Studios

FINAL POINT: House Of Slaughter #13 sets Jolie’s plans into full motion while keeping the Butcher on the defense with time slipping away. Brombal, Fuso and the team progress the slow burn drama with solid art and writing to please fans waiting to see how this story moves onward.

Hit me up on ODPH social media and let me know what you thought of House of Slaughter #13. Thanks for reading.

BRZRKR #12 (BOOM! STUDIOS)

Welcome to an all new edition of Parlay Points, the comic book review blog to the ODPH Podcast!

For this entry, we have arrived at the conclusion of one of the most high-profile Kickstarter books in recent memory which has been released to the local comic shops via Boom! Studios. Considering who is the mastermind behind it, there’s no question why it’s getting the (rightfully deserved) attention it is. BRZRKR #12 by Keanu Reeves, Matt Kindt, Ron Garney and Bill Crabtree for Boom Studios brings to close (in this format) the saga of B, half man, half god, all 100% walking violence. The story has been a brutal journey thru the eyes of an immortal who’s seen enough and looking for a way out. With the events of last issue, all bets are off as to where B’s story concludes for now.

Before we get started with the review, the images featured here may be too violent and graphic for younger readers. Viewing discretion is advised. That said, if you’re still good to go, let’s get the review started, shall we?

BRZRKR #12

Creative: Keanu Reeves, Matt Kindt, Ron Garney and Bill Crabtree (Cover: Alex Maleev)

Credit: Boom Studios

BRZRKR #12

Creative: Keanu Reeves, Matt Kindt, Ron Garney and Bill Crabtree (Cover: Alex Maleev)

Credit: Boom Studios

*** POSSIBLE SPOILER WARNING ***

The story of B (aka Unute) has been drenched in mystery and violence for decades. In present day, B has aligned himself with the US Government as a human demolition derby for some of their most highly dangerous missions. B’s payment has been assistance in finding a way to end his immortal life. Dr. Caudwell has been supervising B’s missions in a way to cover up his own devious interest in B. Meanwhile Dr. Diana Ahuja has been B’s only ally throughout this period.

At last we witnessed B, Caudwell was going to a possible location with secrets to possibl end B’s life. Meanwhile, B had just traveled thru his own existence, making a connection with Diana in the form of a massive blast of energy. Witnessing this latest action, Caudwell finally enacts his master scheme of stealing B’s power. Caudwell siphons the energy from a magical bird impaling B for his energy. If not for Diana, B would truly be dead. Instead, an apparently mortal B and Diana now need to face a powered Caudwell, who has emgered from a chamber crackling with energy. The final battle appears to be at hand.

This issue kicks off with Caudwell and his cult followers facing off with the government forces. B and Diana head into battle with Diana being the super-powered being of the pair now. When B is injured in the fight, Diana steps up and brutally handles Caudwell in a scene that isn’t meant for the squeamish. With Caudwell handled, the pair escape with Keever, a soldier who has been partners with B for many missions. Tying up loose ends, Keever gives the order to wipe everything away. The escaped is shadwoed by bomber jets unloading an arsenal on everything in the battle location.

The lives and B and Diana is changed forever in a way that readers will be intrigued to see play out. Life doesn’t return to normal as B and Diana are considered loose ends that need to be wrapped up in the same way of wiping Caudwell’s secrets off the map. Their manner of handling that aspect leads them to a new status quo but not one without problems.

The conclusion of the story is one that has many layers to it. There is a definite answer to questions that have lingered since the start of the series. There are also some new directions left open to travel down with a few plot points kept open-ended by the final page. Readers will have much to talk about following this finale as it’s a safe bet they haven’t seen the last of this franchise in comic form.

BRZRKR #12

Creative: Keanu Reeves, Matt Kindt, Ron Garney and Bill Crabtree (Cover: Alex Maleev)

Credit: Boom Studios

BRZRKR #12

Creative: Keanu Reeves, Matt Kindt, Ron Garney and Bill Crabtree (Cover: Alex Maleev)

Credit: Boom Studios

BRZRKR #12

Creative: Keanu Reeves, Matt Kindt, Ron Garney and Bill Crabtree (Cover: Alex Maleev)

Credit: Boom Studios

BRZRKR #12

Creative: Keanu Reeves, Matt Kindt, Ron Garney and Bill Crabtree (Cover: Alex Maleev)

Credit: Boom Studios

BREAKDOWN: Reeves and Kindt deliver on a big action finale to the present story while leaving the door open to return should they decide to return. The issue opens up big with tremendous action. The battle with Diana and Caudwell serves its purpose and drops a thunderous close to that plot-line. Post fight is where they move things into uncharted territory. Both B and Diana have to face an unclear future with a huge change in plans for both. It is a huge game-changer that needs to be unspoiled, but once created, takes the story into a very poignant direction moving forward. The writing adds many levels to the final moments which tie certain plots together nicely. Certain elements become full circle. They also pace things out to where the issue feels as a “so long for now” instead of a full “good bye”. It’s not a bad thing but one that will keep readers guessing as to where events move from here.

Garney brings the same intensity to the fighting that this series has become known for. The panels with Diana facing off against Caudwell are as in your face as they come. The damage inflicted holds little back to readers. It sets an early tone that is revisted later when more fighting ensues. B’s life has been centered around conflict and fighting since its’ beginning. The imagery wastes no time in reflecting that, even in more individual standoffs (one especially noteworthy with Keever). Garney levels this off with more emotional moments with Diana and B’s new direction. Without revealing too much, their lives become more complicated after Caudwell’s apparent demise. The reactions to the domino-like effect shines thru leading to a lasting parting shot with many questions coming from it.

BRZRKR #12

Creative: Keanu Reeves, Matt Kindt, Ron Garney and Bill Crabtree (Cover: Alex Maleev)

Credit: Boom Studios

BRZRKR #12

Creative: Keanu Reeves, Matt Kindt, Ron Garney and Bill Crabtree (Cover: Alex Maleev)

Credit: Boom Studios

BRZRKR #12

Creative: Keanu Reeves, Matt Kindt, Ron Garney and Bill Crabtree (Cover: Alex Maleev)

Credit: Boom Studios

BRZRKR #12

Creative: Keanu Reeves, Matt Kindt, Ron Garney and Bill Crabtree (Cover: Alex Maleev)

Credit: Boom Studios

FINAL POINT: BRZRKR has always been a complex tale that delves into the man behind the rage. It has been anything but your average comic story. Not surprising, Reeves, Kindt, Garney and the team present a compelling ending mixed with solid writing and excellent art. The saga of B finally reaches its’ final destination with a closing chapter that will please longtime readers of the series. Make sure to keep an eye out for this book on New Comic Book Day.

Hit me up on ODPH social media and let me know what you thought of BRZRKR #12. Thanks for reading.

NO/ONE #1 (IMAGE COMICS)

Welcome to a very special edition of Parlay Points, the comic book review blog to the ODPH podcast!

For this entry, we are checking out one of the biggest events/series to debut in 2023. “The Massive-Verse”, the home of comic’s most exciting universe, has been setting an extremely high standard in creativity and storytelling since expanding its’ roster following 2022’s “SuperMassive” crossover. With successful debuts for characters such as Rogue Sun, The Dead Lucky and Inferno Girl Red (to name a few), fans have waiting with heightened anticipation to see how this growing roster would shape up in the new year. With announcements such as “The Catalyst War” coming in RADIANT BLACK & “SuperMassive 2” dropping in May, the buzz around this line has grown to a fever pitch. Before we get to those events, there’s one series/event leading the way that is going to set the pace for those events. How they’re presenting this is such a breath of innovative fresh air that simply can’t be ignored or passed on.

NO/ONE #1 by Kyle Higgins (RADIANT BLACK), Brian Buccellato (Detective Comics), Geraldo Borges & Hassan Otsmane-Elhaou welcomes a new character into the ranks of the Massive-verse with an explosive debut that doesn’t stay just in the pages of the comic. The 10 issue maxi-series continues the story via the companion podcast “Who Is No/One” starring Rachael Leigh Cook & Patton Oswalt as the reporters trying to solve the mystery behind the vigilante running around Pittsburgh. This is such an imaginative idea to accompany the comic, but considering what Higgins and company have done with QR codes leading to animated shorts, gatefold issues (see Radiant Black #18) and so forth, it is another reason that the Massive-Verse stands out from the rest on the comic shelves each time out.

The wait is finally over! No/One hits comic shops this week (March 15th)! Let’s see what this Image Comics/Black Market Narrative debut issue is all about, shall we?

NO/ONE #1

Creative: Kyle Higgins (RADIANT BLACK), Brian Buccellato (Detective Comics), Geraldo Borges & Hassan Otsmane-Elhaou

Credit: Image Comics via Black Market Narrative

*** POSSIBLE SPOILER WARNING ***

The book opens up in the Cultural District of Pittsburgh for an art exhibit. A couple is conversing about the pieces along with referencing murders running rampant through the city. They end the conversation to get some alone time on a rooftop balcony but are interrupted with the discovery of a dead man named Louis Capel with four bullet holes in his chest. Meanwhile standing across the building on a rooftop looking down is the mysterious vigilante No/One.

At the crime scene, Detectives August Singh and Kate Harper are investigating the scene. They are two detectives assigned to the case of Richard Roe aka “The Accountability Killer” and his copycats. The mystery of Roe has been hunting Pittsburgh since his first known video comments in May of 2022. Now nearly a year later, the toll its taken on the detectives is clearly visible to the readers. Singh is venting openly how done he is with everything Roe, this being the allegedly third copycat killing. Singh’s rant in interrupted by Pittsburgh assistant chief Ben Kern, who’s got a vested interest in the case. Kern is handed a note found on the victim. Before he can react, Chief Mixon calls in to have Kern removed from the scene.

Outside the building, a mob of frightened and angry citizens have arrived to find out what has happened. One of which being Pittsburgh Ledger reporter Julia Paige, who’s digging into the case herself. Readers don’t wait long to find a clue of who Assistant Chief Kern has a deeper investment in this case as the mob starts shouting at him about his son.

The following Day, Singh and Harper are talking with Capel’s family concerning the murder. The conversation is very emotionally charged (as expected) but readers find out that Capel was a digital target of No/One previously. However, there is someone watching the events unfold from a distance. Meanwhile, at the Pittsburgh Ledger, Editor Teddy Barlow has made the call to put Julia on a podcast breaking down the Richard Roe case since the public is visiting the main webpage in record numbers.

No/One’s shadow weighs heavy on the public but arguably Ben Kern carries the full baggage. Readers see two very important conversations: One involving his son Michael (who’s battling his own personal demons) at Neomi Kern’s grave. The other is at the Allegheny County Jail to see Aaron Kern, who is also known as Richard Roe, the accountability killer!

What is said during these conversations that pulls Kern into a new direction trying to solve the case? After leaving the jail, an action happens that raises more questions to an already complex case! Readers will not be ready for what transpires there, but just wait for the final few pages. Within those moments, the drama has been turned up anther notch building towards a shattering final image that will leave readers shocked and excited to get the next issue in their hands immediately.

BREAKDOWN: Higgins and Buccellato weave a multi-layered mystery within the initial debut. Richard Roe’s impact has been felt for almost a full calendar year (the timeline of events is featured at the end of the book with a great character index & details about Aaron Kern) and the writing reflects the frustration of the citizens of Pittsburgh while slowly unveiling the man behind the mask. The pacing breaks down the large cast into three focused areas. Singh and Harper’s panel time reflects the citizens with the anger and anxiety Roe’s actions have caused. Paige’s story feels as it will be told thru the eyes of the reader as she sets forth to present the details of the case with a “reasonable voice.”

Their stories take a step back in comparison to the tale of the Kern family. Higgins and Buccellato portray Ben Kern as a conflicted character balancing his fatherly duties to his civic duties as an officer. Kern’s struggles shine with the conversations with his son. Both have a different tempo and distinct endings. It makes for what follows that much more greater. The final set-up of the last pages are exceptionally placed to add a building tension to its’ jaw-dropping conclusion.

Borges wastes no time in bringing the strong reactions of “No/One’s” actions to the readers. There is a full page panel showing Capel’s demise that pulls no punches (including the couples reaction). It’s matched with a fantastic two-page spread with No/One standing over the rooftop watching. Borges captures the strain and wear Roe’s actions have taken on the detectives and the people of Pittsburgh. This comes right to the forefront when Singh & Harper talk with Capel’s family. There is a great action moment sprinkled in the story which is incredible and sets up a great twist but this issues emotional builds are what will have people talking. Borges uses a multi-panel format (7-9) which echos a “Watchmen” feel in bringing Ben Kern’s drama with his sons to the readers. The perfect example is this technique is the final pages of the book which concludes with an exclamation point final image.

FINAL POINT: The latest entry into the Massive-Verse establishes itself as a must-read mystery that simply can not be missed. Higgins, Buccellato, Borges & the team present a city on edge with an enigmatic figure at the center of it’s breaking point. Phenomenal writing and imagery set the stage for not just a book, but an event that comic fans can’t afford to miss and the local comic shops and in podcast form with “Who is No/One.”

Hit me up on ODPH social media and let me know what you thought of No/One #1 and the companion podcast “Who is No/One.” Thanks for reading.

GRAMMATON PUNCH #1 (COMIXOLOGY ORIGINALS)

Welcome to an all new edition of Parlay Points, the comic book review blog to the ODPH Podcast!

For this entry, we’re checking out a brand new debut on the Comixology Originals line that flips the traditional ghost story blueprint into a whole different direction. What happens when someone can not only see ghosts BUT fight them back? Grammaton Punch #1 by Miles Gunter (NYC Mech, Terminator, BPRD), Briane Andan, Lee Loughridge, Taylor Esposito, Dee Cunniffe and Ed Dukeshire introduces readers to Van Nguyen and his unique ability. Get settled in as we’re about to take a closer look at where one boy’s fight against the paranormal goes in this introductory issue. Let’s begin, shall we?

Grammaton Punch #1

Creative:Miles Gunter, Briane Andan, Lee Loughridge, Taylor Esposito, Dee Cunniffe and Ed Dukeshire

Credit: Comixology Originals

Grammaton Punch #1

Creative:Miles Gunter, Briane Andan, Lee Loughridge, Taylor Esposito, Dee Cunniffe and Ed Dukeshire

Credit: Comixology Originals

*** POSSIBLE SPOILER WARNING ***

The issue opens up with Van Nguyen narrating his backstory. Readers witness a solar eclipse which Van states being born during isn’t all that great. As Van is in his mother (a power lifter) ’s stroller, a one-eyed ghost appears and makes a connection with him. Van tells the audience that being an “eclipse baby”, he can now see ghosts and vice versa. Van became a power source for the ghost as it ate off his life energy for five years.

During that time, Van was in and out of the hospital, left very weakened from the feedings. Doctors ran many tests but the only result that they could find was an anomaly with Van’s eyes. The ghost’s attacks also turned Van’s hair white. Being only Five years old, Van looked as he was going to be facing this problem for the rest of his life. Everything changed when Van unlocked a key factor involving the ghost: If it could physically touch him, Van could physically fight it back!

At this moment, Readers see him defend himself for the first time. Van hits the ghost with a right hand that Mike Tyson would be proud of. With the ghost seemingly gone, Van finally began had a chance at a healthy life and with prescription sunglasses hiding his gifts. It seemed short lived as “Eye Face” returned, but Van was ready and disposed of his foe again…and again…and again. Each time, “Eye face” took longer to return but Van was waiting and stronger than the last encounter.

Things seemed to becoming normal as Van accompanies his mother to a power-lift competition, until something happens that changes everything. What went down at the lift? Is Van ready to face what lies ahead? Readers bare witness to a growing child’s dilemma of trying to live a “normal” life with unique gifts. Things move pretty fast with some more obstacles piling up before the final image throws a big question mark on the debut issue heading into the next chapter.

Grammaton Punch #1

Creative:Miles Gunter, Briane Andan, Lee Loughridge, Taylor Esposito, Dee Cunniffe and Ed Dukeshire

Credit: Comixology Originals

Grammaton Punch #1

Creative:Miles Gunter, Briane Andan, Lee Loughridge, Taylor Esposito, Dee Cunniffe and Ed Dukeshire

Credit: Comixology Originals

BREAKDOWN: Gunter sets up the foundation for a very imaginative story. Van’s saga catches readers off the start with presenting the toll “eye Face” is taking on him and his mother. The pacing builds to such a point that readers can feel the moment when he first punches “Eye Face” out of town. It’s an enjoyable section that takes the story into a new direction. Van is a whimsical lead that grows up fast with the challenges thrown his way. The latter half of the issue demonstrates how Van’s journey isn’t so cut and dry. Van’s impulsiveness makes complete sense considering his age at this placement in story. Heading into the concluding moments, Gunter does a great surprise setting the stage for the next installment.

Andan brings a high energy to the panels artwork. There is a My Hero Academia-esque feel to when Van starts fighting back. Those panels convey the changing of story tempo. No page illustrates that more than when Van realizes he can hit “Eye Face” back. Speaking of “Eye Face”, Andan envisions the ghost as a true imposing figure, especially one that is tormenting a five-year old. It’s counter balanced when Van grows confidence in battling back. The issue never feels like there is a lull in-between panels. Van’s world is one to easily hit with readers a the series moves onward.

Grammaton Punch #1

Creative:Miles Gunter, Briane Andan, Lee Loughridge, Taylor Esposito, Dee Cunniffe and Ed Dukeshire

Credit: Comixology Originals

Grammaton Punch #1

Creative:Miles Gunter, Briane Andan, Lee Loughridge, Taylor Esposito, Dee Cunniffe and Ed Dukeshire

Credit: Comixology Originals

FINAL POINT: “With Great Power, One must have a Great Punch!” Gunter, Andan and the team establish a young hero with solid storytelling and electric imagery. Grammaton Punch #1 will be a hit with readers looking for something that stands on its own with many themes mixed in the overall narrative. Make sure to keep an eye out for this series on Comixology this week.

Hit me up on ODPH Social Media and let me know what you thought of Grammaton Punch #1. Thanks for reading.

STONEHEART #1 (IMAGE COMICS)

Welcome to an all new edition of Parlay points, the comic book review blog for the ODPH podcast!

For this entry, we’re checking out a debut fantasy series from Image Comics featuring a writer/artist that has been crushing it on fantastic books like Frank Miller’s Pandora, RADIANT PINK and INKBLOT. Stoneheart #1 by EMMA KUBERT introduces readers to the wildly imaginative world of Shayde Whisper, a character that is sure to have fans talking. The mystery behind Whisper and the land of Athea is about to unfold so let’s not delay any longer and check out what’s happening, shall we?

STONEHEART #1

Creative: Emma Kubert

Credit: IMAGE COMICS

*** POSSIBLE SPOILER WARNING ***

The story opens up with a map of Athea, breaking down the important areas of the land. Excellent way to introduce the new landscape to readers with definitive points of interest to keep eyes on.

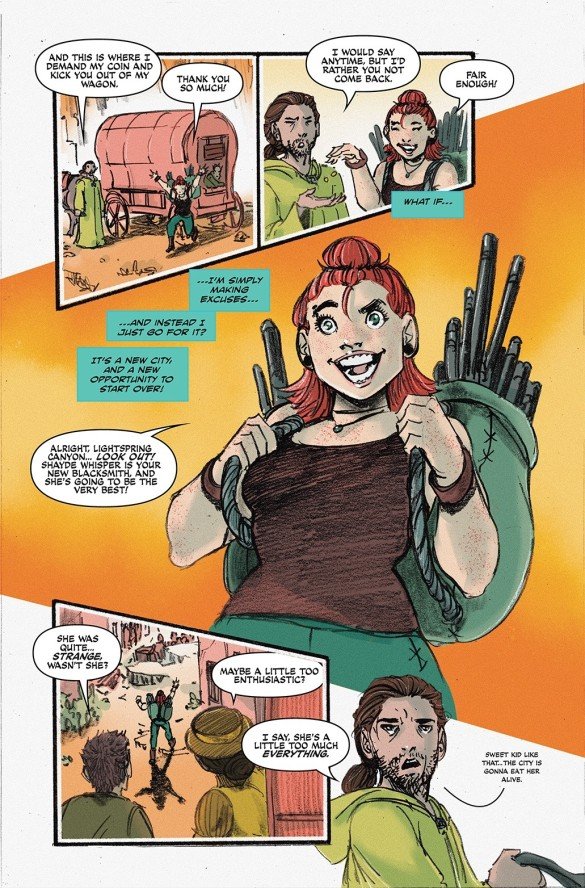
From here, The Paladins of the North Estron Kingdom are holding court concerning the fate of a figure who has created a polarizing reaction. The banter is confrontational amongst the council known as the Council Of Might. The reactions are very different in deciding on the young woman’s punishment. Some say help her, some say exile her from the kingdom. This ends with a decision from Chieftain Orphidian, who has heard enough. She summons the accused known as Shayde Whisper to face the council. Whisper is led in via chains to face the group. Readers see there is a voice talking with her and seems to have an influence on what has transpired. In a fit of rage, Whipser (also known as Paladin Stoneheart) breaks free but is subdued quickly. With this latest action, the council makes their decision and exile Stoneheart from the kingdom!

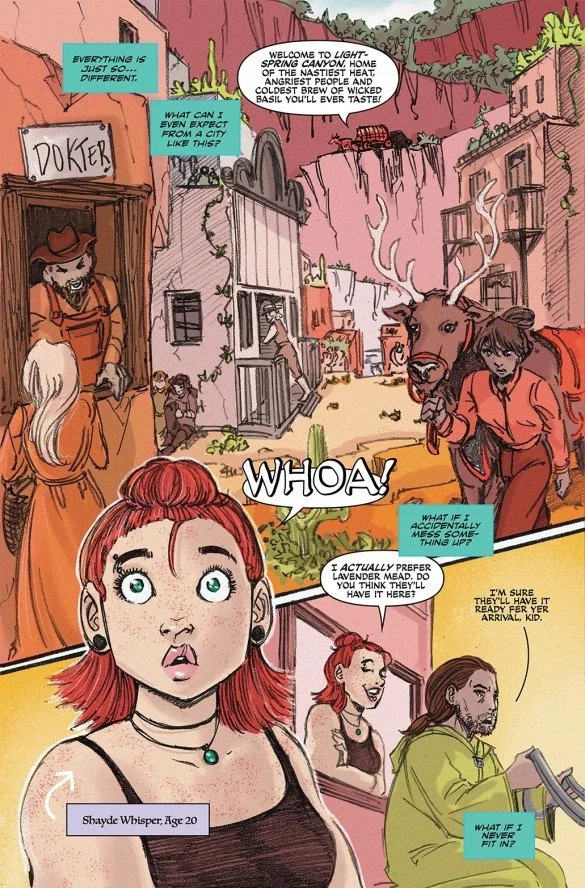
A man walks up and appears to mindwipe her thoughts, resulting in her waking up in a carriage heading towards the Lightspring Canyon of Etrana Kingdom in Athea. Whisper appears to be facing the new place with optimism and excitement. It’s a far cry from the dangerous being the Council thought stood before them. Once arriving in town, Whisper hits the ground running establishing a new life and career. However, as the story unfolds, readers see that Whisper’s past might not be done with her.

What new dangers now lurk in her new hometown? How far can she run from her past? Who is behind the influencing voice. The final act grabs readers along for the ride as Whisper’s new stat quo is established with mystery looming in the shadows and an action that will have big ramifications moving forward.

STONEHEART #1

Creative: Emma Kubert

Credit: IMAGE COMICS

STONEHEART #1

Creative: Emma Kubert

Credit: IMAGE COMICS

BREAKDOWN: Kubert is writing and drawing this series, presenting fans with a captivating tale with a lead character’s secret as the driving point. For being a debut issue, Kubert take the time to introduce all the major players with caption boxes, noting their ages as well. This plays into the council’s decision to exile Whisper out of the Estron Kingdom. Readers see the differences of the elders versus the younger members factoring in the choice of punishment. Once the story shifts to the LightSpring Canyon, Kubert spends a solid amount of time to forge the beginning friendship between Whisper and the local Blacksmith which makes the events of the final act much more impactful. Pacing works well to move the story forward without tipping off too much. The conclusion ends things with a unique style cliffhanger but one work to add more questions going to the next issue. It’s an excellent way to have readers interest spiking even more from this debut issue.

The art reflects the mystical backdrop to this story. Great use of the black and white coloring for the Estron Kingdom moments while establishing the voices with the turquoise and red color blocks for the voices. Once the story moves locations and goes to full color, Kubert brings to life a vibrant energy reflecting Whisper’s endless positivity. Her reactions to the events happening made a connection with the readers. The new landscape has a certain charm to it with its’ various residents making it noteworthy. Even with all the world building, there are some excellent action scenes which play into a bigger role heading to the final act. Speaking of that act, things move pretty quickly but Kubert never lets the emotions slide as the events unfold. Readers won’t be disappointed with how things conclude as they’re left with much to ponder with anticipation as this fantasy tale is only beginning to start its’ journey.

STONEHEART #1

Creative: Emma Kubert

Credit: IMAGE COMICS

STONEHEART #1

Creative: Emma Kubert

Credit: IMAGE COMICS

FINAL POINT: Is optimism enough to survive on when danger and deception constantly looming? That is the question Stoneheart #1 poses. Readers are greeted to the enigmatic Shayde Whisper with a fantastic mix of intriguing storytelling and imaginative art. Emma Kubert sets the stage for a fantasy tale that shows no sign of missing its mark. Don’t miss your chance picking up this engaging comic at the local comic shop this week.

Hit me up on ODPH social media and let me know what you thought of Stoneheart #1. Thanks for reading.

ROGUE SUN #11 (IMAGE COMICS)

Welcome to a brand new edition of Parlay Points, the comic book review blog to the ODPH podcast!

For this edition, it’s anniversary time for one of the massive-verse’s biggest stars. One year ago, ROGUE SUN made its’ debut and welcomed readers into the world of Dylan Siegel and the supernatural side of comic’s most exciting universe. Leading into year two & being featured in a prominent event with SuperMassive 2, this superhero saga has fans looking forward to a big 2023. However, Dylan’s got some unsettled business with a brand new threat to deal with before closing off its’ second arc next issue.

ROGUE SUN #11 by Ryan Parrott, Abel, Natalia Marques and Becca Carey (editor Michael Busittil) brings the latest chapter with the mysterious Hellbent. Being pushed to his limits, let’s take a closer look and see how Dylan is handling a threat unlike any he’s faced before, shall we?

ROGUE SUN #11

Creative: Ryan Parrott, Abel, Natalia Marques and Becca Carey (editor Michael Busittil)

Credit: Image Comics

*** POSSIBLE SPOILER WARNING ***

After the death of his father, Dylan Siegel is passed down the mantle and powers of Rogue Sun, the supernatural protector of Earth. Since that life-changing moment, Dylan has had a rough road learning to become a hero while balancing out a “normal” life with a new family he knew nothing about prior. Factor maneuvering through high school and Dylan has his hands full. Readers have watched him face dangers head on, even taking a deep personal toll on him. With everything he’s been through, his current challenge might be his most dangerous (and it’s not an upcoming Homecoming high school dance either).

A villain driven on revenge for what Dylan did involving his father, Hunter aka Hellbent made a deal with a powerful and dangerous entity which has ties to his father: Mourningstar. From their initial encounter, Hellbent left Dylan for dead. Trying to fight back against a villain who nearly killed him is going to a tough ask for the young hero by himself. Luckily, Dylan has a new mentor in the form of Caleb Hawthorne, the KNIGHT SUN! After being summoned by Dylan’s step-sister Aurie, Caleb has filled in a void Dylan needed desperately. With one shot to take a magical Quill out of Hellbent (and his boss’s reach), Dylan takes a trip on the wild side to the realm of the Ravyn Queen.

This issue picks up where Dylan and Caleb are meeting with the Rayvn Queen in her Aviary realm about the history of the Quill. Readers get an excellent breakdown of how the magical creature was wiped out from existence and the only remnant was the powerful feather. Dylan pleads his case to the queen but it’s getting the feather that easily. He’s tested to challenge her imposing protector of the Aviary in combat. Should he survive, Dylan gets the feather. Failure means dire consequences. Against his council’s wishes, Dylan accepts.

Meanwhile back in New Orleans, Hellbent is growing his influence by pushing drug dealers to expand their coverage with him providing protection for a cost. Hellbent’s actions haven’t set well with his father and now draws the attention of Mourningstar. Hellbent diverts his plans for now, recommitting to taking care of Rogue Sun. All the while, the homecoming dance is unfolding at Dylan’s school. Dylan wasn’t planning on attending but now his dance card is full. Can he survive the Doorman to acquire the Quill? Is this enough to stop Hellbent and Mourningstar? At what lengths are the villains willing to go to get what they want. Readers don’t wait long as the final act sets things in motion for what can only be a showdown for the ages that in inexcusable to miss!

BREAKDOWN: Parrott juggles many elements of this issue with ease building towards a monster conclusion. The Ravyn Queen panels showcase the growing pains of Dylan and Caleb’s new partnership while trying to find a way to stay on the mission at hand. The banter between all three is solid and even drops a few great one-liners in the mix. It’s resolution works and gives this issue some great action points while unearthing more about Rogue Sun’s potential (as Dylan is still learning what he can do with his power). There is a big moment where this comes to life that readers will be excited to see. There’s a conversation later in the issue between Dylan and Caleb that ties this current arc together perfectly reflecting on fathers and son. Hellbent and the dance attendees maximizes their respected time in this issue with noteworthy scenes. The final moments of this issue cap everything off perfectly leaving readers on the edge of their seats for next issue.

Abel returns to Rogue Sun after being off the last two issues with a strong return. The Aviary realm display had a great look to make it pop off the page. Readers will have no question where they are in that portion of the story. The confrontation with the Doorman played out with some fantastic moments, and one new element featured in Rogue Sun’s arsenal that will have a huge positive reaction amongst the fans. The panels involving Hellbent’s father showed off excellent emotional reactions to the events unfolding. It ties everything back to how this all began with the father and son narrative which plays such a huge role for this series. Incredible mic drop moment with the final panel to send readers into the arc finale next issue.

FINAL POINT: Abel reunites with Parrott and the team to bring the Hellbent arc to a boiling point with this issue. Readers will be locked in from the start with fantastic storytelling and art which has become this series’ calling card since its’ debut one year ago. Rogue Sun has never had the stakes set higher if he fails and readers simply can’t leave the comic shops this week without this issue in hand.

Hit me up on ODPH social media and let me know what you thought of Rogue Sun #11. Thanks for reading.

BUFFY THE LAST VAMPIRE SLAYER SPECIAL #1 (BOOM! STUDIOS)

Welcome to an all new edition of Parlay Points, the comic book review blog to the ODPH podcast!

For this entry, we’re checking out a one-shot from Boom! Studios featuring a familiar name in the land of pop culture. If you grew up in the 90’s-early 2000’s, you are guaranteed to have heard the name of “Buffy” and immediately connected it with “Vampire Slayer”. From the initial movie in 1992 featuring Kristy Swanson in the title role to the memorable WB (pre-CW) show from 1997-2003 starring Sarah Michelle Gellar, the character has remained in the pop culture eye with no signs of slowing down via the various Buffy universe stories coming from Boom! Studios. One of those stories is Buffy The Last Vampire Slayer Special #1 by Casey Gilly, Joe Jaro, Maria Keane, Lea Caballero, Joana Lafuente and Ed Dukeshire. Let’s take a closer look at this special and see what unfolds, shall we?

Buffy The Last Vampire Slayer Special #1

Creative: Casey Gilly, Joe Jaro, Maria Keane, Lea Caballero, Joana Lafuente and Ed Dukeshire (Cover: Ario Anindito)

Credit: BOOM! Studios

Buffy The Last Vampire Slayer Special #1

Creative: Casey Gilly, Joe Jaro, Maria Keane, Lea Caballero, Joana Lafuente and Ed Dukeshire

Credit: BOOM! Studios

*** POSSIBLE SPOILER WARNING ***

The story is set in London of an alternate future where Buffy Summers was the last Vampire Slayer until Thessaly, the daughter of Tara and Willow has now been chosen to become a slayer. Becoming a guardian over the new slayer (with help from Spike, a vampire and lover in this timeline, an older and wiser Buffy has now made it her mission to train Thessaly for her destined future. Excellent job by Boom! to write in the quick 101 paragraph to catch new readers up to speed on this series.

This story kicks off with Spike working with Thessaly on sharpening her skills. The banter is easy to connect as the rebellious teenager isn’t too keen on listening to elder advice. Thessaly is more focused on meeting up with Iris, her girlfriend. All the while, Buffy is working with Wren and Anya of the Watcher’s council on a possible lead on finding an old friend in the United States! What does this lead have to do with Thessaly? Can the new slayer handle the responsibility of the mantle? Will the team survive each other long enough to solve this mystery? Readers get taken on a fun adventure that mixed with great surprises along with “family” drama closing with a promising ending.

Buffy The Last Vampire Slayer Special #1

Creative: Casey Gilly, Joe Jaro, Maria Keane, Lea Caballero, Joana Lafuente and Ed Dukeshire

Credit: BOOM! Studios

Buffy The Last Vampire Slayer Special #1

Creative: Casey Gilly, Joe Jaro, Maria Keane, Lea Caballero, Joana Lafuente and Ed Dukeshire

Credit: BOOM! Studios

BREAKDOWN: Gilly builds an enjoyable tale focusing on the “family” dynamic of Thessaly, Spike and Buffy. With a new slayer to train, Buffy tries balancing being a supportive maternal figure with being tough on training Thessaly for the dangers to come. Thessaly is a “normal” teenager with her interactions. Seeing how she’s learning control of her abilities will stand out to readers. Solid reveals heading into the latter portion of the story. The final moments concludes with an interesting ending that I’m sure readers won’t see the last of this universe in the future.

Multiple artists on this book kept things moving at a solid pace. Thessaly’s powers stood out as big events when used in those panels. The quieter scenes with Buffy and Thessaly helped connect readers to the building of their bond which progresses as the issue goes on. Once the biggest reveal happens, it comes across as a huge deal and one that readers will immediately see a shift in the story. The final pages tie up loose ends before sending the characters off with some great personal moments.

Buffy The Last Vampire Slayer Special #1

Creative: Casey Gilly, Joe Jaro, Maria Keane, Lea Caballero, Joana Lafuente and Ed Dukeshire

Credit: BOOM! Studios

Buffy The Last Vampire Slayer Special #1

Creative: Casey Gilly, Joe Jaro, Maria Keane, Lea Caballero, Joana Lafuente and Ed Dukeshire

Credit: BOOM! Studios

FINAL POINT: Both fans of the Buffy franchise and new readers checking it out for the first time will be very pleased with what they find with the Last Vampire Slayer special #1. The creative team establish an entertaining story with solid writing and art to keep fans locked in from the opening page to close. Keep an eye out for this book on New Comic Book Day!

Hit me up on ODPH social media and let me know what you thought of Buffy The Last Vampire Slayer Special #1. Thanks for reading.

PHANTOM ROAD #1 (IMAGE COMICS)

Welcome to an all new edition of Parlay Points, the comic book review blog for the ODPH podcast!

For this entry, an Eisner nominated creative team reunite for Image Comics with a brand new series that will have fans talking on New Comic Book Day! PHANTOM ROAD #1 by Jeff Lemire and Gabriel H. Walta, the team behind Sentient, link up with Jordie Bellaire and Steve Wands hits the open road with a driver who’s life spins out of control after helping someone on the side of a highway. Let’s take a closer look at this debut issue, shall we?

PHANTOM ROAD #1

Creative: Jeff Lemire, Gabriel H. Walta, Jordie Bellaire and Steve Wands

Credit: Image Comics

*** POSSIBLE SPOILER WARNING ***

The story begins with a driver named Dom screaming at someone in his tractor-trailer to let him in, fearing for his life! With the door locked, Dom looks right at the reader with sheer terror in his eyes.

From here, the story shifts gears to an earlier time where Dom is driving down the highway at night. Things seem to be a routine drive. Dome pulls in to a rest stop diner for a quick meal and coffee. Dom sparks a conversation with the waitress about how he’s almost at his destination of North Dakota and they both close with “We’ll get there.”

Hitting the road again, Dom starts flashing back to his childhood and a rough moment between his parents fighting. His mother is angry at what his dad (a truck driver as well…like Father, like Son) has been doing while driving and neglecting his son. The dad counters with questions about the mother before leaving for a new job, promising Dom a new toy when he comes home.

When Dom focuses back on the road, he swerves out of the way of a car accident. With a body lying in the road, he finds Birdie sitting against the car with an object that caused Birdie to swerve in the road. With Birdie talking frantically, Dom goes to see the object. When he touches it, a green flash happens and they’re now in daylight with a mysterious figure in the distance.

Who is this figure? What was the object and what effect does it have Dom and Birdie? Are the pair even where they think they are? Things escalate quickly as the pair is thrown into a situation neither is ready for. The final panel will have readers waiting to see what happens next for the pair as their story has just begun.

PHANTOM ROAD #1

Creative: Jeff Lemire, Gabriel H. Walta, Jordie Bellaire and Steve Wands

Credit: Image Comics

PHANTOM ROAD #1

Creative: Jeff Lemire, Gabriel H. Walta, Jordie Bellaire and Steve Wands

Credit: Image Comics

BREAKDOWN: Lemire lays the foundation of a very engaging story. From the offset, Dom’s life is very routine in the sense of his job. The flashback moment with his parents is significant as it gives readers a glimpse of how Dom became set on this profession much like his father. Whether there is a connection to recent events or not remains to be seen as the story just shifted locations. The dynamic with Birdie was a strong point of the issue as well. Both are now connected and need each other to survive. The mystery of the artifact set the tempo for the final act with a great horror element before closing this chapter out.

Walta and Bellaire do a superb job bringing the (literal) day and night difference in Dom’s life to readers throughout these pages. The beginning of the issue is very relatable to readers and hits the emotional points when dealing with the family flashback. The panels where Dom sees himself and his dad at separate times while driving also jumps out. Great use of colors (Red lighting for the accident, Green for the crossover) to seq-way the story’s changes. Strong build throughout the final portion to capture the horror energy before closing with the near full page final panel.

PHANTOM ROAD #1

Creative: Jeff Lemire, Gabriel H. Walta, Jordie Bellaire and Steve Wands

Credit: Image Comics

PHANTOM ROAD #1

Creative: Jeff Lemire, Gabriel H. Walta, Jordie Bellaire and Steve Wands

Credit: Image Comics

FINAL POINT: Phantom Road #1 wastes no time delivering a mesmerizing tale combining the worlds of fantasy horror and realistic drama to give readers an excellent must-read addition to their comic collection. Lemire, Walta, and the team have something special in the making here, so jump on-board now and see what everyone’s gonna be talking about at the local comic shops!

Hit me up on ODPH social media and let me know what you thought of Phantom Road #1. Thanks for reading.

RADIANT BLACK #22 (IMAGE COMICS)

Welcome to a brand new edition of Parlay Points, the comic book review blog to the ODPH podcast!

For this entry, we are now on the road to the Catalyst War with the Massive-verse’s flagship title. As it was announced this past week, RADIANT BLACK has a HUGE storyline starting at issue #25 which if you’ve been following this series, the seeds have been planted for quite some time. With that announcement, it joins No/One (due March 2023) and Supermassive 2 following after as premier comic events for comics’ most exciting line. In the meantime, there is a calm before the storm within the latest issue following Nathan Burnett.

RADIANT BLACK #22 by Kyle Higgins, Eduardo Ferigato, Ze Carlos, Raul Angulo, DC Hopkins and Michael Busuttil (Image Comics via Black market Narrative) takes a small detour from recent events to give readers a reminder of how far one of our heroes have come since issue #1. Let’s not wait any longer and jump in this trip to the west coast, shall we?

RADIANT BLACK #22

Creative: Kyle Higgins, Eduardo Ferigato, Ze Carlos, Raul Angulo, DC Hopkins and Michael Busuttil

Credit: Image Comics via Black Market Narrative

*** POSSIBLE SPOILER WARNING ***

When this series began, Nathan Burnett returned home from a failed venture as a writer in Los Angeles. The only thing he has to show for it was a nearly $40,000 credit card debt. Once he returned to Lockport, Illinois, fate had different plans for him as he became connected to the Power Radiant and became the hero known as Radiant Black. In that journey, there has been highs, lows, near-deaths, passing of mantles to his best friend Marshall when he was in a coma, more radiants emerging and oh yeah……ONE GIANT FREAKING ROBOT! Last issue showed Nathan and Marshall being recruited by the U.S. Postal Inspection Service to track down their nemesis Shift and his weapons trafficking in St. Louis while Radiant Yellow is breaking down the mystery of the giant robot and how the world as we know it is in danger.

During their venture to St. Louis, Nathan gets a message from his ex in LA, JJ, about a short story he wrote for TV. Nathan assures Marshall that he’s “very done” with LA. However, Nathan heads back to LA for a short moment with JJ’s assurance that this is a real deal for TV. On the plane, Marshall and Wendell (Radiant Yellow) have tasked Nathan to search Shift’s phone (which he took during their encounter) for more clues on the robot and what’s going after as told by Wendell). Once he lands, Nathan starts having flashbacks to his previous time in the city of Angels. After running into old friends Elizabeth and Micah, Nathan makes his way to JJ’s apartment with her new boyfriend (and Nathan’s old roommate) Brayden.

Readers will see the dread in Nathan has he “reconnects” with the obnoxious Brayden until the save is made by JJ, who’s spinning about the project but there’s some other factors involved that Nathan’s not so cool with. Clearing his head, Nathan checks out an address in Shift’s phone that might prove to be a valuable lead heading into the mystery of the robot. At this stage, readers see a quick moment of Radiant business before getting to the main event. After more flashbacks and time with Brayden (along with a surprise event), Nathan meets with JJ’s boss, the fate of Nathan’s story is displayed. How does the meeting go? What is Nathan’s reaction to all that unfolds? The closing moments give readers an ending to think about before heading into the next stage towards the Catalyst War.

BREAKDOWN: Higgins breaks away (for the most part) the super heroics to bring Nathan back full circle with a return to the beginning of his journey. The LA trip was an interesting call-back but one that worked factoring in what’s ahead. In a way, it almost feels as Nathan was trying to make closure on his past before facing an uncertain future. Seeing the flashback moments with Brayden (who was insufferable) established what Nathan walked away from the first time crystal clear to long time readers. Heading into the final act, Higgins sets things up where there is a different feel as Nathan meets with JJ’s boss. Thought-provoking final line and panel to close things out before heading back “home”.

The art duties were split for this issue between Ferigato and Ze Carlos (along with Raul Angulo), who last Massiveverse readers saw his work during Rogue Sun #7 (The “Choose Your Own Adventure” issue). This works great with this issue as Carlos’s art was the Radiant side adventure while Ferigato took Nathan’s trip in Los Angeles. Ferigato and Angulo portrayed the flashbacks exceptionally, making them stand out and contrasting the present day actions of Brayden. Seeing Nathan’s range of emotions added a solid layer to the story and gave depth to his backstory prior to issue #1. The final panels tie up Nathan’s journey and gives readers an interesting thought knowing what is coming up next when he returns back to Lockport.

FINAL POINT: Radiant Black #22 closes and opens a plot point for Nathan Burnett that has lingered since the debut issue. Higgins and Ferigato dive into the toll the return to Los Angeles takes while Ze Carlos keeps the super heroics featured with fantastic art and storytelling. The issue provides a calm before the storm facing our heroes this summer so make sure to check this out on New Comic Book Day to see a different side of Radiant Black.

Hit me up on ODPH social media and let me know what you thought of Radiant Black #22. Thanks for reading.

TRICK PONY (COMIXOLOGY ORIGINALS)

Welcome to an all new edition of Parlay Points, the comic book review blog for the ODPH podcast.

For this entry, we’re checking out the latest graphic novel by a writer who is no stranger to them. Greg Lockard, who readers know from his graphic novel Liebestrasse, returns to Comixology Originals with a brand new story. For TRICK PONY, Lockard is joined by Anna David, Lucas Gattoni and Will Dennis for a tale about one man’s journey facing his past to find his future. Let’s take a closer look at what’s unfolding with this story, shall we?

TRICK PONY OGN

Creative: Greg Lockard, Anna David, Lucas Gattoni and Will Dennis

Credit: Comixology Originals

TRICK PONY OGN

Creative: Greg Lockard, Anna David, Lucas Gattoni and Will Dennis

Credit: Comixology Originals

*** POSSIBLE SPOILER WARNING ***

The story begins with a crowd shuffling into a rodeo. The PA announcer is getting them hyped up introducing “The sweetheart of the rodeo….Jimmy Thomas!” The vibe is Jimmy is just pushing thru as his best days are long gone. As he rides his horse into a flaming circle, Jimmy is thrown off the horse upon landing. Waking up to a doctor checking him over, Jimmy is told to stop horse-riding as one more fall could prove deadly. Defiantly, Jimmy ignores the advice. At this moment, Jimmy is told by Gram, the rodeo manager that his mother called with bad news about his father. He’s in the hospital and things do not sound good. Jimmy acts unfazed by this news and is only focused on going to party after the show.

With the drinks flowing, Jimmy brushes off calling his mother back and sets out to party the night away. He’s approached by a reporter in the bar for a cover story. Jimmy escapes the crowd with him and starts a conversation. The topic shifts to Jimmy’s future in the business, which Jimmy evades to only get more tequila. As the night moves forward, so does Jimmy’s partying. From drinking, dancing and making out with a gentleman acquaintance, Jimmy makes the most of the night. This leads to a surprise move a Jimmy finds his horse, Emmylou and ventures to see his parents while figuring out his future.

From the city, Jimmy and Emmylou make their way to Silver Creek. As he makes a stop to splash some water on hi face, Emmylou becomes scared as a walking coyote (with Jimmy’s notable 2 different colored eyes) appears to be stealing his satchel. A chase ensues which leads to Jimmy wrestling the creature down only to have the tides turned. At this moment, Jimmy is taken back to his youth and beginnings in the rodeo. Readers witness as Jimmy does a ride but his fellow rider/boyfriend Zeke doesn’t fare as well. Zeke is injured from the ride and can’t try riding until a few surgeries happen (at best). During this time, their love is challenged by Jimmy’s success and offers to leave for the big show. Zeke ultimately ends things for the two and Jimmy snaps back to “reality” where the creature leads them to shelter for the night. On this journey, the creature shifts into a dog named Casey and they arrive at the doorstep of Casey’s owner, who offers shelter from an upcoming storm. Sparks begin to fly between the owner and Jimmy. Even with the passionate moment, Jimmy is still thinking about the past with Zeke.

At this stage, readers see another figure appear before Jimmy. This encounter leads Jimmy down a more dangerous path as he keeps flashing back to other moments with Zeke. What do these visions mean? How do they try into the present? Will Jimmy get back to his parents or be lost in his own dark journey? Readers will get to ride along with Jimmy as he faces his past legacy as the tale takes quite a few detours before ending up at its’ fulfilling conclusion with Jimmy’s future defined.

TRICK PONY OGN

Creative: Greg Lockard, Anna David, Lucas Gattoni and Will Dennis

Credit: Comixology Originals

TRICK PONY OGN

Creative: Greg Lockard, Anna David, Lucas Gattoni and Will Dennis

Credit: Comixology Originals

TRICK PONY OGN

Creative: Greg Lockard, Anna David, Lucas Gattoni and Will Dennis

Credit: Comixology Originals

Breakdown: Lockard shapes the story of Jimmy Thomas as a defining statement of how love can conquer all. The novel is broken into a few key places backing that statement up. Jimmy’s love of the rodeo is a driving point of his character and one he refuses to walk away from even though it may kill him. Jimmy’s love of family is another point as that becomes his drive to race against time to see his father. That said, those loves fail in comparison to his love of Zeke and the emotional toll it takes on him to escape from its’ demise before wrestling with its closure before moving on. The self exploration Lockard sets Jimmy on to unlock captures readers as they see him battle to find the one love that ultimately wins him. There is no clear-cut path to that answer with many stops along the way in reflecting the past to set forth the future. Mixing in elements such as guides like “coyote” made for unique twists in Jimmy’s path. The ending doesn’t miss the landing as it leaves readers with a definitive answer to where Jimmy’s heart lies now.

David combines fantasy imagery in with the realistic look at Jimmy’s journey into his own vision of love. The transformation of the coyote into the dog was a rime example of this. It also showed how Jimmy was dealing with his memories of his times with Zeke, losing himself in those moments. Another great Segway into his flashbacks involves a near full page panel involving lightning to send him back into his own memories of an argument with Zeke. These are balanced out with vivid scenery as Jimmy treks back to his parents on horseback. Davis makes these panels stand out with brighter colors to set the tone of happiness in contrast to hiding his emotions with his partying lifestyle with blue colors. Excellent final panel to close the novel out with a lasting image for readers.

TRICK PONY OGN

Creative: Greg Lockard, Anna David, Lucas Gattoni and Will Dennis

Credit: Comixology Originals

TRICK PONY OGN

Creative: Greg Lockard, Anna David, Lucas Gattoni and Will Dennis

Credit: Comixology Originals

TRICK PONY OGN

Creative: Greg Lockard, Anna David, Lucas Gattoni and Will Dennis

Credit: Comixology Originals

TRICK PONY OGN

Creative: Greg Lockard, Anna David, Lucas Gattoni and Will Dennis

Credit: Comixology Originals

FINAL POINT: Trick Pony centers around one man’s path into closure for past emotions while discovering what is his true vision of love is. Lockard, David and the team bring this tale to life with poignant writing and vivid art to brings readers along for a defining ride for a hero of the rodeo. Make sure to keep an eye out of this OGN on Comixology for New Comic Book Day.

Hit me up on ODPH social media and let me know what you thought of Trick Pony. Thanks for reading.

MIGHTY MORPHIN POWER RANGERS/TEENAGE MUTANT NINJA TURTLES II #3 (BOOM! STUDIOS/IDW)

Welcome to an all new edition of Parlay points, the comic book review blog for the ODPH Podcast!

For this entry, we have arrived at the midway point of one of the biggest crossovers in all of pop culture fandom! MIGHTY MORPHIN POWER RANGERS/TEENAGE MUTANT NINJA TURTLES 2 by Ryan Parrott, Dan Mora, Raul Angulo and Ed Dukeshire for Boom Studios & IDW Publishing has been an exceptional sequel to the 2019 initial story. With a surprise enemy emerging from close in their ranks, the combined forces of Power Rangers and Ninja Turtles are pushed to their limits. How does the halfway point shape things up? Let’s take a deeper dive and see how things unfold, shall we?

MIGHTY MORPHIN POWER RANGERS/TEENAGE MUTANT NINJA TURTLES 2 #3

Creative: Ryan Parrott, Dan Mora, Raul Angulo and Ed Dukeshire

Credit: Boom! Studios & IDW Publishing

MIGHTY MORPHIN POWER RANGERS/TEENAGE MUTANT NINJA TURTLES 2 #3

Creative: Ryan Parrott, Dan Mora, Raul Angulo and Ed Dukeshire

Credit: Boom! Studios & IDW Publishing

*** POSSIBLE SPOILER WARNING ***

When the combined front of the Teenage Mutant Ninnja Turtles and Mighty Morphin Power Rangers defeated Rita Repulsa and Shreddar, all parties knew that trouble would come back around sooner than later. Six months after that encounter, Casey Jones (TMNT ally) went missing after looking for Shreddar. Shortly there, Baxter Stockman (TMNT villain) was freed from jail with an assist from Ranger X, the new identity of Casey Jones! With the good guys reeling from Jones’ change, the forces of evil launch an attack on the Power Rangers Command center. With Zordon in immediate danger, a surprise figure enters the battle to defend him: Shreddar?!

This issue wastes no time hitting the ground running with Shreddar jumping in the fight. It buys enough time for Alpha to get Zordon to safety but Jason (Red Ranger) and Tommy (Green Ranger) stay with Shreddar/ All the while Stockman and Ranger X hit the rangers in a big way. They trigger a fault in their morphin powers! Now left powerless due to the Morphin Grid being hacked, the heroes have to run and leave the command center in the possession of Rita Repulsa and Krang!

Once the heroes reconvene, Shreddar appears and makes his intentions known. He hasn’t become a hero. He is fueled by revenge for being ousted by Krang after the last defeat. It’s solid motivation as it appears Rita is on the verge of conquering, using Angel Grove as their playground. Can the heroes come back? An idea is thrown to the group, but it’s worth a shot to see if it can tip the fight back in their favor. Readers won’t believe what they see as the good guys mount their attack! If anyone thinks that’s big just wait until another player in this game makes a shocking move setting a small team of heroes into a familiar place but with a dangerous figure joining them in the final moment.

MIGHTY MORPHIN POWER RANGERS/TEENAGE MUTANT NINJA TURTLES 2 #3

Creative: Ryan Parrott, Dan Mora, Raul Angulo and Ed Dukeshire

Credit: Boom! Studios & IDW Publishing

MIGHTY MORPHIN POWER RANGERS/TEENAGE MUTANT NINJA TURTLES 2 #3

Creative: Ryan Parrott, Dan Mora, Raul Angulo and Ed Dukeshire

Credit: Boom! Studios & IDW Publishing

MIGHTY MORPHIN POWER RANGERS/TEENAGE MUTANT NINJA TURTLES 2 #3

Creative: Ryan Parrott, Dan Mora, Raul Angulo and Ed Dukeshire

Credit: Boom! Studios & IDW Publishing

BREAKDOWN: Excellent work by Parrott ramping up the surprises throughout this issue. Just when things look bleak, the heroes come up with a crazy idea for dealing with the Morphin Grid being hacked and it works SO well! Readers will enjoy this sequence immensely. Throwing Shreddar into the mix as a “frenemy” also provides a unique dynamic for the heroes. Knowing how dangerous he is, the lingering tension haunts these scenes and presents more challenges as the story progresses. Pacing is never an issue here and with all the characters involved in big battles, no one felt overshadowed or lost. It’s a skill that Parrott pulls off perfectly each time it is presented in any story he does. The big surprise reveal late in this chapter is a great addition to this story. Readers will be thrown for another loop but it’s a fascinating play that connects easily to the situation at hand. Excellent final banter from the heroes to close out the latest installement moving things towards the final act.

The best artist in comics today continues to level this story up. Dan Mora makes the smallest action moments feel HUGE. The battle for the command center has key moments but it’s exclamation point is actually Rita’s demonic smile at the havoc she created. The moment everyone will be talking about though is how the heroes deal with not having the powers from the Morphin Grid. No spoilers but Mora gives it a enormous debut and the following action will blow readers away. It’s counter-balanced when a character makes a big reveal late in the book. The emotional reactions give those scenes more gravity as it sends the story into a new direction.

MIGHTY MORPHIN POWER RANGERS/TEENAGE MUTANT NINJA TURTLES 2 #3

Creative: Ryan Parrott, Dan Mora, Raul Angulo and Ed Dukeshire

Credit: Boom! Studios & IDW Publishing

MIGHTY MORPHIN POWER RANGERS/TEENAGE MUTANT NINJA TURTLES 2 #3

Creative: Ryan Parrott, Dan Mora, Raul Angulo and Ed Dukeshire

Credit: Boom! Studios & IDW Publishing

FINAL POINT: The combined fandoms of MMPR and TMNT will be on the edge of their seats for the action and drama unfolding in the latest chapter of the epic sequel crossover. Parrott, Mora and the team keep raising the bar with amazing writing and phenomenal art. There is much to be excited about within these pages, so make a point to pick this series up at the local comic shop!

Hit me up on ODPH social media and let me know what you thought of MMPR/TMNT 2#3!

Thanks for reading!
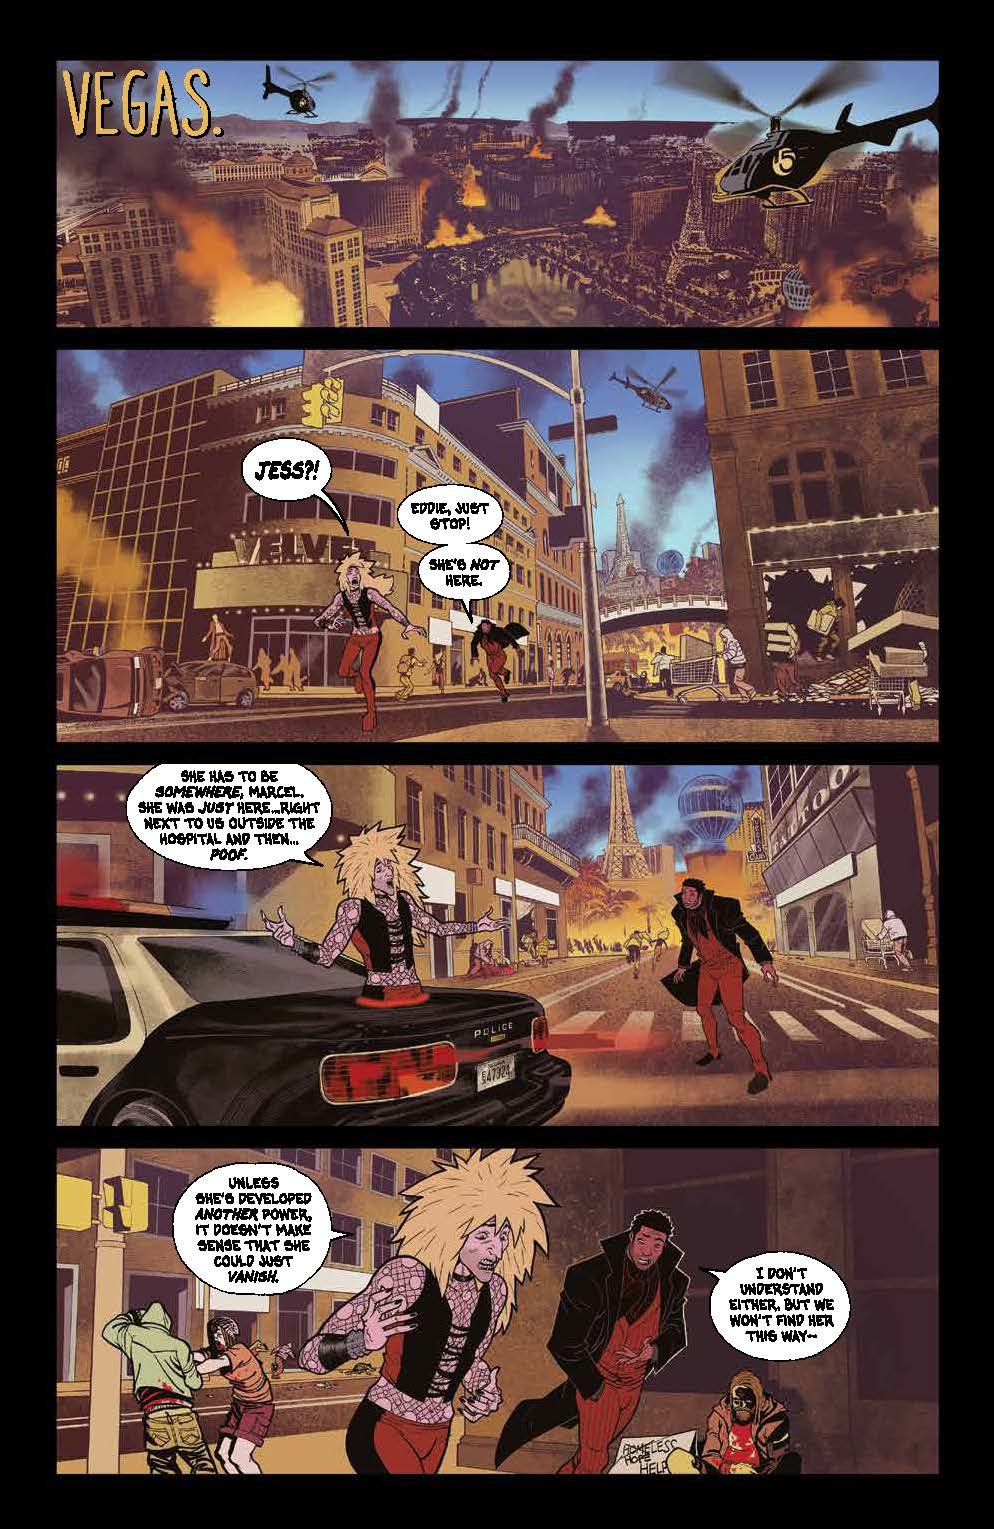
DAMN THEM ALL #5 (BOOM! STUDIOS)

Welcome to a brand new edition of Parlay Points, the comic book review blog to the ODPH podcast!

For this entry, we are near the end of the first arc of one of BOOM! Studios’ most imaginative series. DAMN THEM ALL #5 by Simon Spurrier, Charlie Adlard, Sofie Dodgson, Shayne Hannah Cui, and Jim Campbell takes readers to the penultimate closing of its’ initial debut with an issue that will have fans talking.

Editor warning: this book has some panels that might be too mature for younger readers. That said, let’s jump into the latest chapter and see where Ellie and company take readers now, shall we?

DAMN THEM ALL #5

Creative: Simon Spurrier, Charlie Adlard, Sofie Dodgson, Shayne Hannah Cui, and Jim Campbell

Credit: BOOM! Studios

DAMN THEM ALL #5

Creative: Simon Spurrier, Charlie Adlard, Sofie Dodgson, Shayne Hannah Cui, and Jim Campbell

Credit: BOOM! Studios

*** POSSIBLE SPOILER WARNING ***

Ellie Hawthorne has now been challenged to step in and stop the 72 devils of the Ars Goetia in replacement for her Uncle Alfie, who died mysteriously. Her purpose is very easy: send all of the 72 devils back to Hell. With help from Dora, an officer with a complicated past with her uncle Alfie, and some more “allies”, Ellie sets out to complete the mission or die trying. Last we saw Ellie and co, they were dealing with Theo Bolster and the 500 Club. After an impromptu exorcism, Theo seems defeated but is far from it. Ellie is back on her mission and wastes no time hitting the ground running.

This issue opens up with Ellie, Dora and Frankie Wax (Ellie’s “boss”) raid the home of Ninebob Barry and his devil Vine. The scenes are intense and waste no time in setting a frightening tone. Ellie makes her way into Barry’s room and finds him waiting with an old friend sent by Theo: Glasya-Labolas, a demon who’s already impacted Ellie and her circle of associates. The resolution to this conflict is one that readers won’t see coming! Its’ repercussions send Ellie on a wild path that ultimately ends up with an ending that will stun faithful fans of this series!
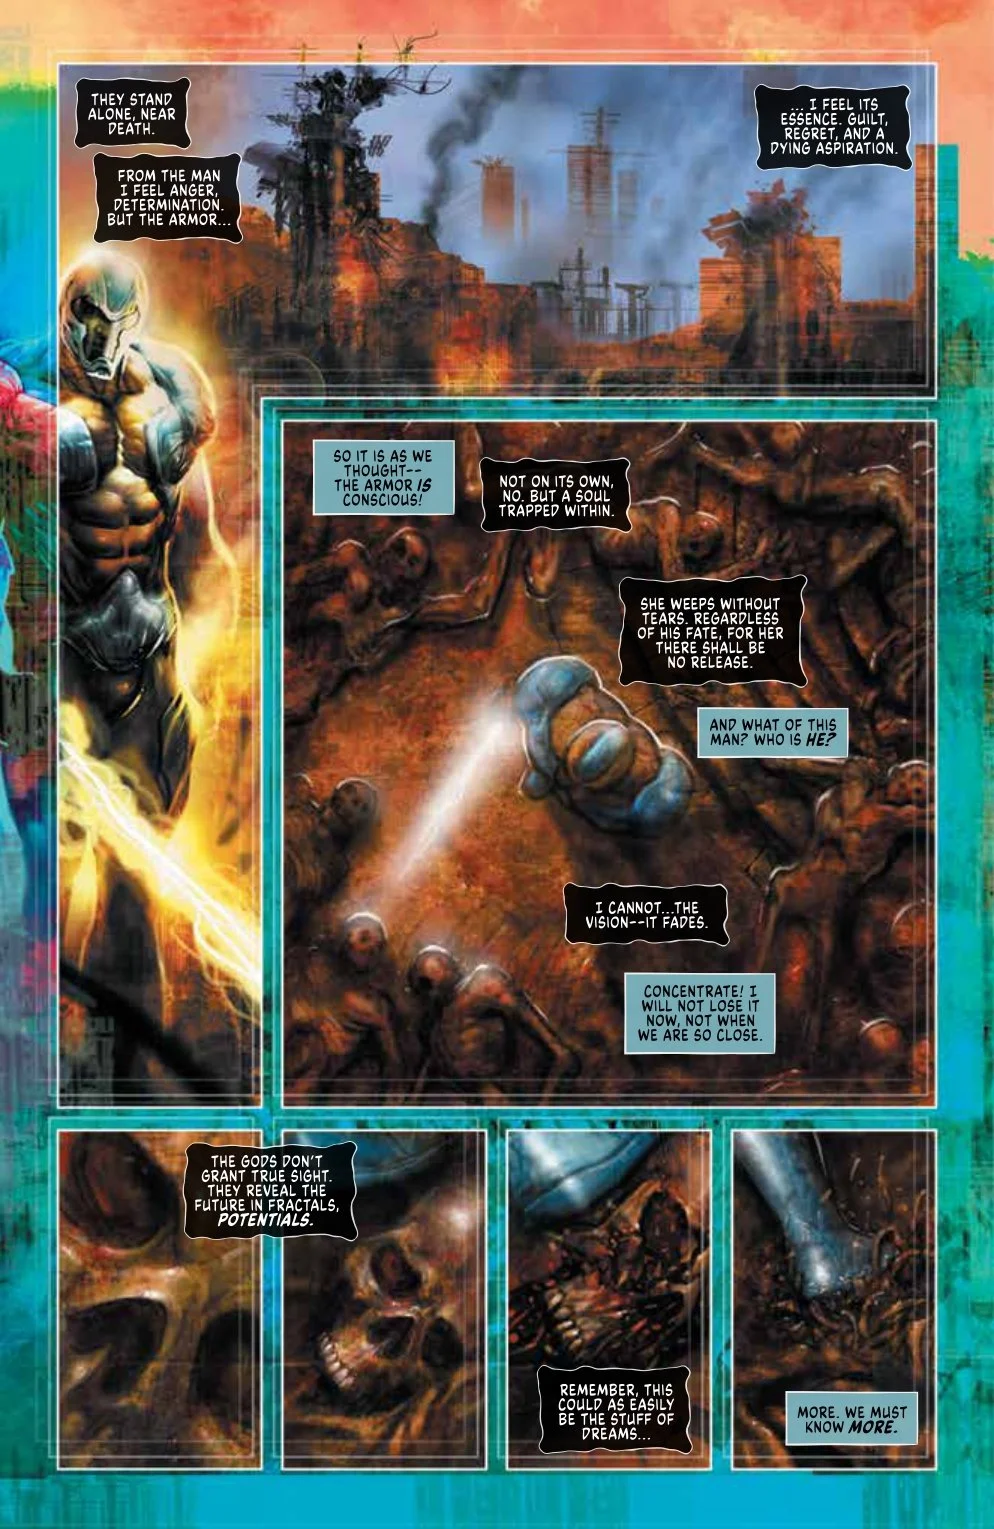
DAMN THEM ALL #5

Creative: Simon Spurrier, Charlie Adlard, Sofie Dodgson, Shayne Hannah Cui, and Jim Campbell

Credit: BOOM! Studios

DAMN THEM ALL #5

Creative: Simon Spurrier, Charlie Adlard, Sofie Dodgson, Shayne Hannah Cui, and Jim Campbell

Credit: BOOM! Studios

DAMN THEM ALL #5

Creative: Simon Spurrier, Charlie Adlard, Sofie Dodgson, Shayne Hannah Cui, and Jim Campbell

Credit: BOOM! Studios

BREAKDOWN: Heading into the arc finale, Spurrier wastes no panels in bringing some closure to Ellie while opening up a whole new chapter. The story with Ninebob Barry is one that plays into Ellie’s strengths. Never at any point is Ellie defined as a “hero” or plays everything in heroic fashion. This portion of the issue Spurrier brings out the full grey complexity of the character to a solid resolution. Things move fairly quickly here but once that final moment hits, it is a perfect mic drop moment that readers are not ready for.

Adlard doesn’t shy away from the intense imagery with this chapter. The fighting is brutal and bloody. The conclusion of the Ninebob Barry tale holds nothing back. Dealing with the supernatural, the demons look menacing and work to play off of Ellie’s brashness. Even with Ellie’s interactions with Frankie Wax and Carlin, her more “normal” moments and reactions connect as someone who isn’t good or evil, they just are who they are. That said, no other image will get as much buzz as the final one for this issue. Brace for it.

DAMN THEM ALL #5

Creative: Simon Spurrier, Charlie Adlard, Sofie Dodgson, Shayne Hannah Cui, and Jim Campbell

Credit: BOOM! Studios

DAMN THEM ALL #5

Creative: Simon Spurrier, Charlie Adlard, Sofie Dodgson, Shayne Hannah Cui, and Jim Campbell

Credit: BOOM! Studios

DAMN THEM ALL #5

Creative: Simon Spurrier, Charlie Adlard, Sofie Dodgson, Shayne Hannah Cui, and Jim Campbell

Credit: BOOM! Studios

DAMN THEM ALL #5

Creative: Simon Spurrier, Charlie Adlard, Sofie Dodgson, Shayne Hannah Cui, and Jim Campbell

Credit: BOOM! Studios

FINAL POINT: Damn Them All makes a run towards its’ initial conclusion tying up some hanging threads before giving readers a jaw-dropping moment to ponder till next issue. Spurrier, Adlard and the team bring that winning energy in their writing and art that has made this series such a fantastic read since it’s beginning. Don’t miss this on New Comic Book Day.

Hit me up on ODPH social media and let me know what you thought of Damn Them All #5. Thanks for reading!